Tuesday, 29 September 2015

With Sympathy Quick Card


Must be the age I am getting to but I do seem to be making a few With Sympathy cards recently. They also usually need to be made pretty quick and this was a quick card to make.  This was one to send to a colleague of my husband.

I just used two dies on this - Sue Wilson's new Expressions With Sympathy die (she must have known I was going to need it) and one of the dies from Spellbinders Crosses 2.

I just layer some white card onto a blank black card and then made another layer of white card onto black card 2 cm smaller and then mounted the two die cuts in black.

With these cards, I think that the more simple the better and it is the words that go inside that make the card.  


Sunday, 13 September 2015

John Lockwood Workshop


Well,  I guess it is about time that I mentioned the dreaded 'Christmas' word and the first card I made this year was in  John Lockwood workshop that was nearby in my local craft store.  It was only a morning workshop as John was doing a demonstration in the afternoon and I also had a football match to go to.


The project that John had chosen was using Sue Wilson's dies from the Festive Collection and was the Christmas Angel 2015 and also either the Poinsettia Mini Striplet or the Snowflake Mini Striplet. I chose to use the the Poinsettia Mini Striplet.


This was quite a quick project, although John did keep us enthralled with his stories - he really was a fantastic person to do a workshop with.  


The background was created by cutting out the Snowflake mini striplet 3 times onto some Antique gold foundation card and then mounted onto black card.  We then cut out the Christmas Angel in black card but coloured her using gilding wax.  We then coloured the stars but I used a different coloured wax than the Angel.  We then mounted the angel and stars onto acetate and attached to this to the card, creating a domed effect.

We then made the box to go with the card and for the box lid, just used the same striplet to create fancy top to the box.  The base was black card and again we used the Antique Gold card for the top.  I must admit that I made the box top at home as the class had overrun a tad and I did have my football match to get to.


I was also able to make another quick card whilst I was waiting for the class to catch up and made this card just using two of the angels cut out and mounted slightly off each other. Again they were both cut in black card and one was coloured using the gilding wax.


I certainly hope that my local store has John back again next year - I have already reserved my place if he does come back.


Monday, 31 August 2015

Nieces Birthday

This is the card that I made for my niece's birthday.  I can't believe that she is no longer a teenager and hopefully will be able to go to her graduation in 2 years - although I least I will not have to travel to the US for hers.


I thought that I would use one of Sue Wilson 's stamps and dies as I really love her designs and it is nice to have the matching stamps and dies to use.  I used the stamp Kalika Trio.  I coloured it using Chameleon pens. This was the first time that I had really used the Chameleon pens and not sure that I am that keen on them.  The idea sounds great but not as easy to use in reality. To me you do not get as much control with them.  I coloured the centre of another stamped image and then cut out the layers using Greek Island Kefalonia die but only using the outside edges.  I then cut out  another one in cream but this time included the embossing die and then cut out a centre and foiled the greeting onto this.  

I mounted both of these onto cream card adding ribbon to beneath the greeting and then onto brown card.  

Wednesday, 19 August 2015

Clarity Day 2

Project 1
I have finally got round to posting the projects from day 2 of the Clarity retreat. I  thought I would get so much done in the close football season but it hasn't worked out that way and now the season has started I am going to have even less - and still have a two week holiday to fit in.

I was lucky to actually get to day 2 of the retreat as I was staying a a local bed and breakfast which was down a country lane and a tree had blocked the road early that morning.  There was just enough room for my car to go under - with about 1 cm each side and above to spare.  I was lucky that someone had stopped the other side of the tree and could tell me I was going to clear it. I didn't fancy reversing all the way back to find another way.

Project 2
The projects that we did were using techniques that Clarity are more associated with - braying and gelli plate.  The first project was creating a box that looked like it had been mounted onto and the background was done by brayering with acrylic paint.

Project 2 was brayering onto canvas (which Barbara called "walking the brayer") and we also got to use texture paste on it which I had not used before.  It was coloured using Big 'n Juicy ink pads.  Once we had finished the canvas, it was mounted onto another canvas.  

Project 3
Project 3 and 4 were done at the same time.  These two were my favourites mainly because they were using one of my favourite stamp - the blue tit.  We also used the masks that you can get with these stamps on both of the projects and it certainly makes it easier to use them rather than making your own.  We got taught a really quick way to colour the birds using distress inks.  We also used stencils to help create the frame.

Project 4 was using the gelli plate and distress inks .  The distress inks were put directly onto the gelli plate and then brayered.  Although it cannot been seen in the photo, I stamped the image into the gelli plate a few times to  create a watermark effect and then laid the card onto the plate to get the background.
Project 4

Project 5 was stamping and masking and we even got to use tracing paper to help to create this.  I still have not quite finished it as I need to put a border around it and colour it in but  I guess I may get around to that one day - I always keep them in the file provided just as samples so won't matter if I don't finish it completely.

Project 5
I was glad that I had managed to drive through and make it to the retreat as some of the projects I really enjoyed.  The canvas one was not one that I would do again, but it was still good to try it.  Sometimes it is good to know what you would not want to do again without the expense of  having to buy the supplies to know that it isn't for you.  I might still use the texture paste but on a much smaller scale.  

I certainly think that this retreat is one of the best that I have done and can't wait until next year to do it all over again.


Thursday, 30 July 2015

Clarity Workshop Day One

Project 1
I have still got my cold but managed to enjoy my 2 day retreat with Barbara Gray at her retreat.  I had the pleasure of being at the same table as her Mother and the others on the table were really pleasant.  There were 4 tables of 8 which was a nice number and everyone could see what was going on as Barbara sat in front and had a video and a TV screen to ensure everyone could see.  It was just a shame I left my camera behind.

We were all grateful that Barbara had not cancelled these workshops with her other half Dave not being well - especially as she had told us that she had cancelled the TV show that should have been this Sunday.

The format followed was the same as last year and we were  given a folder with instructions for all the samples that we were going to make and then told to put them away as they were not going being used was put on the table for everyone to see.  This was a better idea than passing round the sample and everyone taking their photo of each to work from.  Also, there was usually a choice of at least two colours to work with so that you could make yours a little different.

Project 2
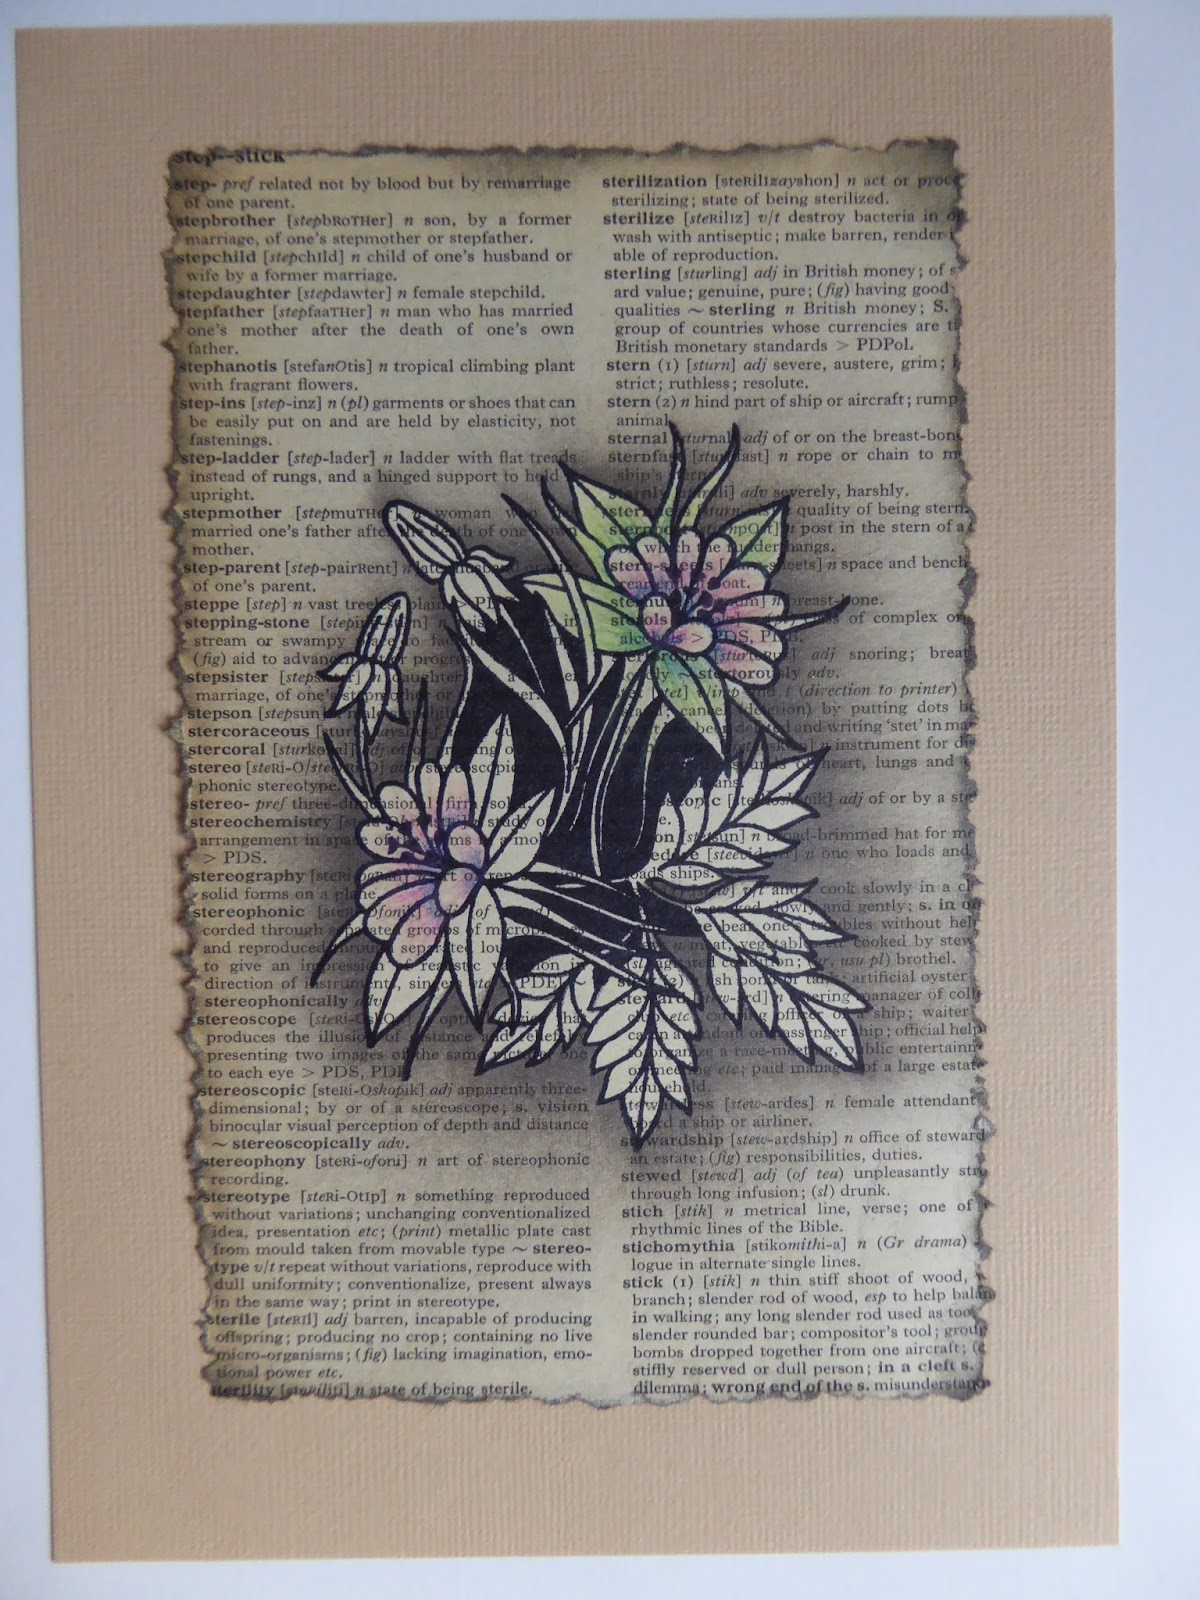
The first project was just a warm up - using stamps, masks and creating depth and colour.  We stamped onto a page from a dictionary, used a mask to create depth in the background and then how to blend colour in.  Some of the projects were left unfinished at the time as the idea was to learn the techniques rather then spend the whole time colouring.

From this, we then went onto our next project which was learning how to create backgrounds and filling in landscapes.  The mountains were created by tearing a piece of paper to create the top and then using a pen to create the layers.  We also used a stencil for the aperture effect but were encourage to go past the borders.  These two projects took up the morning.

Project 3.1
Project 3.2
The afternoon was spent using the Groovy plates and associated mate. This was designed to be a relaxing time and we even had a cd put on to help. The Groovy plates are used with parchment paper and this was designed to get people into parchment craft. Although I have been doing parchment craft  for 15 years, I could still see that I could use the plates in conjunction with my usual way of producing parchment craft.  The good thing is it makes parchment craft available for more people and you are able to achieve your result in a lot quicker time frame.  For people that have not got the time (or patience) to learn from scratch, I think that this provides great results.  I do not believe that this is any different to using the grids that companies have bought out to make getting the effect quicker.
Project 3.3

Barbara also went through the techniques of colouring using Spectrum Noir pencils. Although I am able to make all these project the "old fashioned" way, I would not have been able to do nearly as much in the time frame that we had.  

I do like these retreats as you start of with a blank canvas and go from there - there are no kits in sight!

Wednesday, 22 July 2015

Summer Crafting

I managed to get away to Doncaster for Summer Crafting this month with Stephanie Weightman, Nancy Watts and the team.  I had not been since it had been the one workshop format and was surprised at how many people were there.  It really was packed and took ages just to get into.

The weather was lovely and it was a nice setting looking out on to the racecourse.

Steph and Nancy took the theme of Grease and came in dressed up although the wigs lasted about a minute in that heat.

You're the One That I Want
There were 5 projects that we made and they all took the theme from Grease - We Go together, Beauty School Dropout, Summer Nights, Look at Me and You're the one that I want.  The projects  were all from a papercrafting kit (Pockets Full of Dreams) but there was no way that they could be anything else with the amount of people.  

One of the projects that we did was an ikea jar that we decorated and I thought that it was a nice touch that they supplied Epsom Salts to fill the jar ups to take home.  We also made an bag to hold it in that we decorated.

Summer Nights
I liked the fact that we did not have to take anything with us as the supplied a goody bag with all our essentials in and a few more bits as well.  I was really pleased to see that the Tattered Lace Essentials Christmas Window die and the Tattered Lace Mini Trimmer which were in the bag and it was nice to be able to take them home with us.  We also got to use a small sewing machine and got to take this home as well.  It will be great to use that on cards to save using my good sewing machines.

I am not sure that I really learnt anything from the day but it was meant to be fun and it was certainly that.  Nancy and Steph made sure that they came around and spoke to everyone.  

Although it was hectic and the projects basic, I would still like to go back again next year as it is still good to spend a day with like minded people.

I just have to get over this cold I have at the moment as tomorrow I am off to spend two day with Barbara Gray at one of her workshops - I know I will learn at this one. 

Thursday, 25 June 2015

Brushos Workshop

I am so pleased that there is a local craft shop opened near to me now that does workshops and certainly intend to make the most of them.  It is great just to drive down the road rather than half way around the country. Last Saturday there was a workshop at That's Crafty with Helen Chilton and this time it was using brushos.  I had never used them before and did not really know what they were but was informed that they were great to make backgrounds with.

Nothing ventured, nothing gained so booked in and attended the workshop.  I was quite surprised at the use that I would be able to make of these.  The first thing we learnt was not to open the pots but to just put a small hole in the top and shake the powder out - a little went a long way and also to write the colours on the top of the pots so you would know straight away what colour you were using. 
 

We spent the first part of the morning just making samples using both matt and glossy card and also using cling film, straws, water, stencils and Perfect Pearls mist and finding out what the colours looked like when using different techniques and what the finished effects were.  The colours looked very different to when they were first put on the paper and were very vibrant with water.

One of the techniques that I really liked was putting the powder on dry and then stamping on it with versamark. It was surprising how much detail showed up.  I can see me making use of this technique quite a lot.
 
After making our samples, we then had a choice of making a piece of work with either flowers in reds or buildings in blue using Carabelle Studo Stamps.  I choose to go with a blue background but red flowers to stand out more.  I mainly used the spray technique but then over stamped in black on the background using a Kaisercraft stamp.

The real piece of work was much more vibrant than the photo shows and I would not necessarily make this piece again but the workshop was definitely worthwhile to get an introduction to brushos.