Thursday 10 December 2015

Christmas Cards 2015

I was not sure if I was going to make my Christmas cards this year as I just left myself a couple of weeks.  I had not started before I went on holiday, I just did not realise how little time I was leaving myself, especially as my time was then taken up with sorting out the break in,  That threw me out completely and it was hard to get into the mindset of making Christmas cards.  

I decided that I was going to have to make them really quickly this year and would not be able to make them fancy.  I had seen a similar card of Sue Wilson's blog but wanted to make mine a little simpler due to the time constraint.

Monday 30 November 2015

I have been MIA for a few weeks now as I had a two week holiday in Walt Disney World but came back to find that we had been visited by an unwelcome visitor whilst we were away and have been dealing with the aftermath of that.  Insurance companies are not the easiest people to deal with and of course we are now adding extra security.  Not the best sight when you walk through the door after a long flight but are now near the end of the process.  I have learnt to deal with an insurance company that deals with claims themselves and not through third parties.

I was glad that I had booked a workshop locally to me before I went away, otherwise I don't think that I would have gone.  I have never done a class with this tutor before but it turned out to be an enjoyable class and quite a small one which was good.  It was nice just to be able to concentrate on crafting and clear my head of anything else for a few hours.  It was a good interlude among all the mayhem.

It was making a Christmas Wreath from an MDF kit although you could make cards and tags instead of the wreath.  I wrapped the frame with Hessian before decorating with the poinsettia leaves and petals.  I used a different technique for each part and had fun making this.  It was a nice small class and just what I needed.  

Tuesday 17 November 2015

I find that the hardest card for me to make each year is the one for my husband.  One of the reasons is making it so that he does not see it - he does like to pop into my craft room to see what I am making - usually I don't mind but not when I am making his!  This year was expecially hard as I was also getting everything ready for our holiday.  My mojo had just got up and left and of course found my self running out of time. 
I started with some paper I had picked up in a small craft shop in Page, Arizona a couple of years ago, which had ties printed on it.  I then used a Joanna Sheen die to cut out the shirt.  I used blue glitter card but then cut it out again in white card to make the collar, cuffs and tie stand out. 

I cut out 2 of Sue Wilson's Stacked Diamond Striplets lengthways on some light blue card and mounted this on some darker blue card.  I then cut out the greeting using Sue Wilson's Scripted Happy Birthday and to finish just added some blue gems.


Wednesday 28 October 2015

Mother and Aunts Birthday

As usual, I made a birthday card for my Mother, and then made a similar birthday card for her sister, whose birthday is about 7 weeks later that my Mum sends her.  As my Mother always likes the cards I make for her, it has become a tradition that her sister gets the same from her.  It also saves my Mum having to go out and choose a card as this way she knows she gets one that will she likes rather than searching through the card shops for one.  My aunt also enjoys the fact that she gets a hand made one.  It is nice that me and my mother play a part in her card each year. 
I made my mothers card in blue and my Aunt's in white.  I got the idea from Sue Wilson so of course it was using her dies and stamps.  I just loved her one so much I had to make it. I used the Floribunda stamp design by John Lockwood for Creative Expressions and coloured it in using distress markers. The background was Sue's Striplet die Lattice and lace and I added an embellishment to each flower.

The sentiment was again made using my foiling machine but I also put a very small picture of the roses on this which does not show up in the photo too well but made it more personal. It is also nice to see the two card next to each other and how different they look although are the same.


Monday 12 October 2015

Card for a friend

I decided that I would again use Sue Wilson's dies and the matching stamps for my friends birthday card, which again I made at the last minute.  I started off using the Tied Together Embossing folder by Couture Creations - which is one of my favourites - onto Coconut white card. I mounted this onto a pale blue card.  

I then used the Kalika Trio  stamp which matched the Greek Collection Kefalonia die and coloured this in using Copic pens.  I then cut this out with the Kefalonia die and using the same set cut out a smaller filigree die cut to go on top.  The sentiments was made using my foiling machine.

To finish, I just added some Creative Expressions dazzler from one of their multipacks of various sizes.

Tuesday 29 September 2015

With Sympathy Quick Card


Must be the age I am getting to but I do seem to be making a few With Sympathy cards recently. They also usually need to be made pretty quick and this was a quick card to make.  This was one to send to a colleague of my husband.

I just used two dies on this - Sue Wilson's new Expressions With Sympathy die (she must have known I was going to need it) and one of the dies from Spellbinders Crosses 2.

I just layer some white card onto a blank black card and then made another layer of white card onto black card 2 cm smaller and then mounted the two die cuts in black.

With these cards, I think that the more simple the better and it is the words that go inside that make the card.  


Sunday 13 September 2015

John Lockwood Workshop


Well,  I guess it is about time that I mentioned the dreaded 'Christmas' word and the first card I made this year was in  John Lockwood workshop that was nearby in my local craft store.  It was only a morning workshop as John was doing a demonstration in the afternoon and I also had a football match to go to.


The project that John had chosen was using Sue Wilson's dies from the Festive Collection and was the Christmas Angel 2015 and also either the Poinsettia Mini Striplet or the Snowflake Mini Striplet. I chose to use the the Poinsettia Mini Striplet.


This was quite a quick project, although John did keep us enthralled with his stories - he really was a fantastic person to do a workshop with.  


The background was created by cutting out the Snowflake mini striplet 3 times onto some Antique gold foundation card and then mounted onto black card.  We then cut out the Christmas Angel in black card but coloured her using gilding wax.  We then coloured the stars but I used a different coloured wax than the Angel.  We then mounted the angel and stars onto acetate and attached to this to the card, creating a domed effect.

We then made the box to go with the card and for the box lid, just used the same striplet to create fancy top to the box.  The base was black card and again we used the Antique Gold card for the top.  I must admit that I made the box top at home as the class had overrun a tad and I did have my football match to get to.


I was also able to make another quick card whilst I was waiting for the class to catch up and made this card just using two of the angels cut out and mounted slightly off each other. Again they were both cut in black card and one was coloured using the gilding wax.


I certainly hope that my local store has John back again next year - I have already reserved my place if he does come back.


Monday 31 August 2015

Nieces Birthday

This is the card that I made for my niece's birthday.  I can't believe that she is no longer a teenager and hopefully will be able to go to her graduation in 2 years - although I least I will not have to travel to the US for hers.


I thought that I would use one of Sue Wilson 's stamps and dies as I really love her designs and it is nice to have the matching stamps and dies to use.  I used the stamp Kalika Trio.  I coloured it using Chameleon pens. This was the first time that I had really used the Chameleon pens and not sure that I am that keen on them.  The idea sounds great but not as easy to use in reality. To me you do not get as much control with them.  I coloured the centre of another stamped image and then cut out the layers using Greek Island Kefalonia die but only using the outside edges.  I then cut out  another one in cream but this time included the embossing die and then cut out a centre and foiled the greeting onto this.  

I mounted both of these onto cream card adding ribbon to beneath the greeting and then onto brown card.  

Wednesday 19 August 2015

Clarity Day 2

Project 1
I have finally got round to posting the projects from day 2 of the Clarity retreat. I  thought I would get so much done in the close football season but it hasn't worked out that way and now the season has started I am going to have even less - and still have a two week holiday to fit in.

I was lucky to actually get to day 2 of the retreat as I was staying a a local bed and breakfast which was down a country lane and a tree had blocked the road early that morning.  There was just enough room for my car to go under - with about 1 cm each side and above to spare.  I was lucky that someone had stopped the other side of the tree and could tell me I was going to clear it. I didn't fancy reversing all the way back to find another way.

Project 2
The projects that we did were using techniques that Clarity are more associated with - braying and gelli plate.  The first project was creating a box that looked like it had been mounted onto and the background was done by brayering with acrylic paint.

Project 2 was brayering onto canvas (which Barbara called "walking the brayer") and we also got to use texture paste on it which I had not used before.  It was coloured using Big 'n Juicy ink pads.  Once we had finished the canvas, it was mounted onto another canvas.  

Project 3
Project 3 and 4 were done at the same time.  These two were my favourites mainly because they were using one of my favourite stamp - the blue tit.  We also used the masks that you can get with these stamps on both of the projects and it certainly makes it easier to use them rather than making your own.  We got taught a really quick way to colour the birds using distress inks.  We also used stencils to help create the frame.

Project 4 was using the gelli plate and distress inks .  The distress inks were put directly onto the gelli plate and then brayered.  Although it cannot been seen in the photo, I stamped the image into the gelli plate a few times to  create a watermark effect and then laid the card onto the plate to get the background.
Project 4

Project 5 was stamping and masking and we even got to use tracing paper to help to create this.  I still have not quite finished it as I need to put a border around it and colour it in but  I guess I may get around to that one day - I always keep them in the file provided just as samples so won't matter if I don't finish it completely.

Project 5
I was glad that I had managed to drive through and make it to the retreat as some of the projects I really enjoyed.  The canvas one was not one that I would do again, but it was still good to try it.  Sometimes it is good to know what you would not want to do again without the expense of  having to buy the supplies to know that it isn't for you.  I might still use the texture paste but on a much smaller scale.  

I certainly think that this retreat is one of the best that I have done and can't wait until next year to do it all over again.


Thursday 30 July 2015

Clarity Workshop Day One

Project 1
I have still got my cold but managed to enjoy my 2 day retreat with Barbara Gray at her retreat.  I had the pleasure of being at the same table as her Mother and the others on the table were really pleasant.  There were 4 tables of 8 which was a nice number and everyone could see what was going on as Barbara sat in front and had a video and a TV screen to ensure everyone could see.  It was just a shame I left my camera behind.

We were all grateful that Barbara had not cancelled these workshops with her other half Dave not being well - especially as she had told us that she had cancelled the TV show that should have been this Sunday.

The format followed was the same as last year and we were  given a folder with instructions for all the samples that we were going to make and then told to put them away as they were not going being used was put on the table for everyone to see.  This was a better idea than passing round the sample and everyone taking their photo of each to work from.  Also, there was usually a choice of at least two colours to work with so that you could make yours a little different.

Project 2
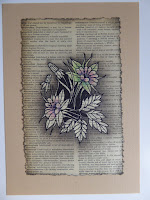
The first project was just a warm up - using stamps, masks and creating depth and colour.  We stamped onto a page from a dictionary, used a mask to create depth in the background and then how to blend colour in.  Some of the projects were left unfinished at the time as the idea was to learn the techniques rather then spend the whole time colouring.

From this, we then went onto our next project which was learning how to create backgrounds and filling in landscapes.  The mountains were created by tearing a piece of paper to create the top and then using a pen to create the layers.  We also used a stencil for the aperture effect but were encourage to go past the borders.  These two projects took up the morning.
Project 3.1
Project 3.2
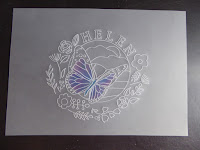
The afternoon was spent using the Groovy plates and associated mate. This was designed to be a relaxing time and we even had a cd put on to help. The Groovy plates are used with parchment paper and this was designed to get people into parchment craft. Although I have been doing parchment craft  for 15 years, I could still see that I could use the plates in conjunction with my usual way of producing parchment craft.  The good thing is it makes parchment craft available for more people and you are able to achieve your result in a lot quicker time frame.  For people that have not got the time (or patience) to learn from scratch, I think that this provides great results.  I do not believe that this is any different to using the grids that companies have bought out to make getting the effect quicker.
Project 3.3

Barbara also went through the techniques of colouring using Spectrum Noir pencils. Although I am able to make all these project the "old fashioned" way, I would not have been able to do nearly as much in the time frame that we had.  

I do like these retreats as you start of with a blank canvas and go from there - there are no kits in sight!

Wednesday 22 July 2015

Summer Crafting

I managed to get away to Doncaster for Summer Crafting this month with Stephanie Weightman, Nancy Watts and the team.  I had not been since it had been the one workshop format and was surprised at how many people were there.  It really was packed and took ages just to get into.

The weather was lovely and it was a nice setting looking out on to the racecourse.

Steph and Nancy took the theme of Grease and came in dressed up although the wigs lasted about a minute in that heat.

You're the One That I Want
There were 5 projects that we made and they all took the theme from Grease - We Go together, Beauty School Dropout, Summer Nights, Look at Me and You're the one that I want.  The projects  were all from a papercrafting kit (Pockets Full of Dreams) but there was no way that they could be anything else with the amount of people.  

One of the projects that we did was an ikea jar that we decorated and I thought that it was a nice touch that they supplied Epsom Salts to fill the jar ups to take home.  We also made an bag to hold it in that we decorated.

Summer Nights
I liked the fact that we did not have to take anything with us as the supplied a goody bag with all our essentials in and a few more bits as well.  I was really pleased to see that the Tattered Lace Essentials Christmas Window die and the Tattered Lace Mini Trimmer which were in the bag and it was nice to be able to take them home with us.  We also got to use a small sewing machine and got to take this home as well.  It will be great to use that on cards to save using my good sewing machines.

I am not sure that I really learnt anything from the day but it was meant to be fun and it was certainly that.  Nancy and Steph made sure that they came around and spoke to everyone.  

Although it was hectic and the projects basic, I would still like to go back again next year as it is still good to spend a day with like minded people.

I just have to get over this cold I have at the moment as tomorrow I am off to spend two day with Barbara Gray at one of her workshops - I know I will learn at this one. 

Thursday 25 June 2015

Brushos Workshop

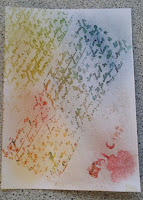
I am so pleased that there is a local craft shop opened near to me now that does workshops and certainly intend to make the most of them.  It is great just to drive down the road rather than half way around the country. Last Saturday there was a workshop at That's Crafty with Helen Chilton and this time it was using brushos.  I had never used them before and did not really know what they were but was informed that they were great to make backgrounds with.

Nothing ventured, nothing gained so booked in and attended the workshop.  I was quite surprised at the use that I would be able to make of these.  The first thing we learnt was not to open the pots but to just put a small hole in the top and shake the powder out - a little went a long way and also to write the colours on the top of the pots so you would know straight away what colour you were using. 
 

We spent the first part of the morning just making samples using both matt and glossy card and also using cling film, straws, water, stencils and Perfect Pearls mist and finding out what the colours looked like when using different techniques and what the finished effects were.  The colours looked very different to when they were first put on the paper and were very vibrant with water.

One of the techniques that I really liked was putting the powder on dry and then stamping on it with versamark. It was surprising how much detail showed up.  I can see me making use of this technique quite a lot.
 
After making our samples, we then had a choice of making a piece of work with either flowers in reds or buildings in blue using Carabelle Studo Stamps.  I choose to go with a blue background but red flowers to stand out more.  I mainly used the spray technique but then over stamped in black on the background using a Kaisercraft stamp.

The real piece of work was much more vibrant than the photo shows and I would not necessarily make this piece again but the workshop was definitely worthwhile to get an introduction to brushos. 

Sunday 14 June 2015

Cousins Birthday

It was time to get back to birthday cards after the graduation cards I have made recently.  This time, I only needed to make one and was for my cousin.  


I decided to make a shirt card as I could you the buttons on the shirt to spell out his name.  I like to give him personalised cards as he means so much to me.

I used some papers that I had bought from Hobby Lobby in the US.  I put the pocket and sleeve using the pattern the other way and just used a foam trip down the centre to create the effect of two separate sides.  I drew stitching around the centre, cuff, collar and pocket and added small gems to the cuffs, pocket top and collar.  The sentiment was from Spellbinders Sentiments 1.

Sunday 31 May 2015

Graduation Cards Part 2

As we had taken my Mother with us to the US, I made the graduation cards for her to give to her Grandson and his girlfriend.  It would be more difficult to buy a card at this time of the year here and what was the point of having a daughter make cards if you couldn't call on her when necessary.

I wanted to use Whiff of Joy Graduation Willow and Graduation Oakley stamps. I had to look around for the stamps to make the cards for her and although I bought Graduation Willow here in the UK I ended up having to buy Graduation Oakley from a store in Iowa, which was quite ironic seeing as that was where the card ended up back.  The problem was that graduations are so much earlier in the US than the UK and there just did not seem to be much around in this country.  Of course, once I got to the US, there were lots of graduation pieces in all the craft stores but by then was too late as we only arrived a day and a half before the ceremony.

Again I wanted to keep the colours blue and yellow for the University and so coloured the robes blue and used copics again for the colouring and decided to make a stepper card using my dies from Tattered Lace.  I then downloaded some images which I coloured and attached to the card and personalised the books with their names and the University's name.  For the greeting, again I typed out what I wanted to say and then foiled it.  I also typed out the verse and foiled that before attaching it to the card.  

I have attached a photo of them both together and think that they make a lovely couple and they certainly made us all very proud.


Wednesday 27 May 2015

Graduation Day

I am now back off holiday - although with the weather we had, it did not quite have a holiday feel as was quite cold.  We had gone to the Iowa in US for the first few days for my nephew's graduation - or commencement - and had taken my mother with us.  We then headed on to Chicago to catch up with friends and for me to catch a baseball game after.

It doesn't seem like 4 years ago that we had a party to wish him well on his course.  We were really delighted that he managed to get a double major and also graduated Summa Cum Laude which is the equivalent of a First Class with Honours here in UK.

His girlfriend also graduated at the same time and it was great to meet her family.  

I decided that I wanted to make the same card for them both but one with a girl and one with a boy.  I managed to find La-La Land stamps Graduation Luka and Graduation Marci which were ideal for what I wanted but had to order them from Texas.  I coloured them with copics but kept the theme blue and yellow, which are the colours of the University.

I used both Spellbinder dies and Tattered Lace dies to create the background and just typed the sentiment onto some card which I then used my foiling machine to finish.

I also made a mortar board to go inside the card that popped up when opened. 

To finish, I typed a verse onto some card, added a picture of a diploma and mortar board and again foiled it.

I did not put a tassel on the mortar board and I could not get the right colour for Emily as the colour denotes the subject in the US and I just could not get the colour Citron right so left both off. 

Thursday 30 April 2015

Quick Card

I found this card which I had not posted before and thought that I would post it as I am running out of time before my holiday. 

I do have some cards ready to post but cannot post them until  the recipients receive them.  

This card was made quickly delving into my old craft stash - some Quickutz dies that I have had for years and some paper that i had long forgotten about.  I think most if this card was made from paper, card and dies at least 8 years old and I can't remember where I got it from or what any of it was called - I didn't even keep the name if the dies - it is sometimes good to delve into the stash to see what is there as I am sure that I will be adding to it shortly.

It is not my usual card but I just fancied playing when I has a spare few moments  - and that seem rarer than hens teeth lately.  I am hoping that things quieten down a bit when I get back - someone needs to invent a 30 hour day - or at least get rid of the commute to London each day.

Sunday 19 April 2015

New Cardigan for Husband

I decided that my husband needed a new knitted cardigan as the last one that I knitted for him had literally been worn out. He gets one that he likes and does not seem to want to wear anything else.

We had gone to The Cheap Shop in Tiptree at the end of January and he chose the pattern he wanted his new cardigan to be.  They have a good selection of crafts and wool and the quality is very good there. The shop is like an Aladdin's cave - it looks small from the front but just goes on and on in the back.

It is no small feat knitting him a cardigan - I have to use the largest size but at least this one was on large needles and was made with super chunky wool.  It knitted up very quickly.  I had to hang it up to get a photo as that was the only way I could get a photo and I knew it would not be off him long.

The button were the hardest items to get but managed from an online store that ships from Hungary.  I used Knitpro Symfonie needles for this first time and now know why they are so expensive.  I did not think that they would make such a difference but am now hooked on them - to me they are worth every penny.

I found the cable knit on this a little different to usual but was pleased how it turned out.  Just two more left on the list to make now but do need to get back to cardmaking .

Sunday 29 March 2015

1st Workshop of the Year

I attended my first workshop of the year yesterday at a That's Crafty which is a local craft shop near me which had only recently opened as a brick and mortar shop open on a Saturday. 

I hadn't planned on attending the workshop but we had gone there last week to have a look around and my husband saw this workshop and told me I should do it - I think he was trying to get rid of me for the day.

The workshop was with Helen Chilton and was a workshop on using Stampbord. I had never used this before and it was a nice class size of 6.  I thought that it was a really nice workshop and was just the relaxation that I needed.  I only seem to be able to spend the time I want crafting at one of these workshops - at home there is always something that takes priority over my crafting - the travelling to and from work seems to get harder.

The first part of the workshop was spent making 3 ATC size projects which was to give us a taster of what we could do with the stampbord.  We stamped images onto the stampbord and then coloured them with distress inks - using cotton wool balls to put the ink on and blend.  We then etched highlights into the designs. We used Paper artsy's Lynne Perrella stamps as these stamps had enough detail to be able the colour the different areas and also to effectively etch in the designs.  
We then punch eyelets in the corner and embossed around the edges using Stampendous Fran-tage Aged Gold Embossing Enamel.

For our main project, we first stamped image around the outside of some 8 x 8 Heavy Grey-white Board and laying TCW mini quatrefoil stencil over, used distress in in a couple of colours to create the background.  We then added some stampbord in various sizes that we had stamped, coloured and etched.

We then triple embossed some wooden embellishements and also some paper die cuts using the Stampendous Fran-tage Aged Gold Embossing Enamel  and added these to the project.

This was not something that I would usually make but I did enjoy this workshop and am hopefully going to be able to attend another workshop with Helen in June.

Sunday 15 March 2015

Birthday Card for a Football Supporter

This card was one I enjoyed as it was for a fellow Spurs supporter and I thought that I would make good use of my foil applicator again.
 
I first foiled some Centura Pearl with the Spurs badge and then cut this using the Tattered Lace Die Monumental Happy Birthday.  I mounted this onto some blue Stardream card which was then mounted onto Centura Card.
 
I then put his name down the side using some letters that I had in my stash.  The only thing I did not have was an envelope to fit so had to make that as well as this card is not a usual size.  At least I know that no-one else would have got him a card like this.

Saturday 28 February 2015

Two for quickness


I can't believe that it is March tomorrow.  I really cannot believe how quickly the year has gone already.  I really need to try and find more time to craft but it does not seem to be happening this year and it will not be that long before I am going to the US to see my nephew graduate.

I had to make two birthday cards so to make them as quick as possible, I decided to make them both very similar to save time and the two recipients did not know each other.   

The first one was for a commission from work and  was wanted in the colours of the Barbados flag.  I was originally asked for the flag to be on the card but after discussions agreed that the card would be better in just the colours as it was for his mother.  I used the embossing folder Tied Together by Couture Creations for the background on blue card and then attached small yellow pearls.  I used Sue Wilson's Spanish Collection Seville dies to create the topper in blue and yellow and added a yellow pearl again to the corner of the blue card.  I then used a Tattered Lace die sentiment in black to give the final colour of the flag and added Nan down the edge to finish this card.


With the second card, I made this the same but instead of the Seville dies, I used Valencia and made it it purple and pink.


Wednesday 18 February 2015

In Sympathy

I never used to make sympathy cards but here I am making another one just a few month after the last.

This one was very quick and easy to make as I used my new Heidi Swapp Minc foil applicator.  I just designed the topper on my computer, printed it with a laser printer onto card and then put it through the machine using silver foil.

I then cut it out and mounted it onto black card.  On the black card I made a cross with black seam binding but it does not show in the photo but wanted the subtleness of black on black.  I then mounted onto white card and rounded the edges.  

I am really pleased with the way it came out and think that the machine is well worth the money - and not too expensive which is even better.  I can see that I will be using this machine a lot to create foiled toppers.

Friday 30 January 2015

60th Birthday

I was asked by a colleague at work to make a card for her husband's 60th birthday.  As she is a golf widow, she wanted it to be gold themed.

I used papers and toppers from from Hunkydory's "Its a Man's World - Just Fore You" mounted on red and gold stardream card. Although I do not usually use kits - every now and then they come in real useful and the design was just what I needed.  I was unable to find some stamps that would give me the same effect and wasn't sure that if I could find any that I would get good use out of them.

I made his name using Memory Box Varsity Alphabet in gold and green and also the 60 on the golf ball.  


Tuesday 13 January 2015

Been busy lately ....

I haven't posted for a while as time just seemed to run out for me.  I have not even spent much time crafting lately.  I did manage to make all my Christmas cards but never posted as I just never found the time.  I was also rushed to get my Mother's Christmas present made and did not make that in time - but did get it finished just in time for New Years day when I took her back home. It was another twinset but I could not get a real good photo of it.  The colours came out differently for each part and in reality was a really nice pale blue. The trouble was I had to take the photo a night as it was going back with my Mother and she doesn't own a camera - not even on her phone! I have also been busy organising this years two holidays to the US - one of which is to see my nephew graduate.
 
I did manage to get a workshop in at Oyster Crafts on colouring which was very enjoyable but for once I did not make a card but just coloured some samples which I haven't got round to doing anything with yet and the are Christmas images so won't be using them until much later this year.
 
I spent a day in November at the Making of Harry Potter and just loved seeing the castle model with all the snow.  If you haven't been there yet - it is well worth it just to see the model and is there until the end of January.
 
In December we spent 10 days in Germany and managed to get to the Christmas Markets in Nuremberg, Regensburg, Jena, Leipzig, Dresden, Gera and Cologne. I especially loved the one in Dresden where I managed to buy lots of Plauener Spitze (Plauen Window picture lace).  I also managed to catch up with some old friends in Regensburg that I hadn't seen for 20 years.  It felt like we were just picking up where we had left off all those years ago, it was only the place that had changed and not us! 
 
I also managed to find a new craft store chain that I had not seen before - Idee.  At first I thought that it was just a one off but have since found out that they have lots of stores - that's another excuse for me to keep going back to Germany.  I also managed to buy a Steiff Limited Edition Bear and a Steiff Dalmation for myself - or at least I bought the bear and my husband bought me the dog.
 
I am hoping that this year I can be more crafty and organised but will wait and see what happens.  Definately feel that work is getting in the way of crafting but guess that is what pay for it!