Tuesday 24 December 2013

Merry Christmas and a Happy New Year

This time I thought that I would show some craft that I did not make but certainly love

Last year, whilst in Germany, we fell in love with  the German Candle Arches or "Schwibbogens" that we saw in all the markets.  The best ones were the original ones from Erzgebirge but they were rather expensive and we ended up with a small one from a market that was not from Erzgebirge.

We had told our friends in Germany that we had bought a smaller and cheaper one this summer and then found that in our Christmas Hamper this year that they had included an original Erzgebirge Schwiboggen and this was not small - it is 25.5 inches long.

Needless to say that this has pride of place in our window and looks lovely especially when lit at night.  

I wish you all a Merry Christmas and a prosperous New Year and wish good health and happiness to you and your families.

Monday 16 December 2013

Parchment Envelope Card

Although this card looks like an envelope, it is in fact a card.  It was made for a wedding card as usually these are rarely stood up. 

I traced the pattern onto plain parchment paper and then embossed the outer edge of the back of the card and also the dots in the pattern on the front.  I also lightly embossed the pattern of the outside front border. 

Then using Gold tinta ink, I drew around the dots and also filled in the pattern of the outside front border and the ring joining the two halves of the pattern. 

Using a grid I perforated where I had filled the pattern in with Gold tinta ink. and also the crosses on the pattern. I also perforated the shape of the card. I then stippled  the border on the front of the card.  Using a star tool, I embossed on the front of the card.

I then cut out the cross and also around the borders to create the shape of the card.  I then coloured the reverse of the parchment paper with Dorso to give the shade of pink that I wanted. 

To finish, I attached a piece of pearlescent paper to the inside slightly smaller than the border.


Saturday 7 December 2013

For my Mum's Sister

When my Mother remembers that I make cards, I usually offer to make a birthday card for her sister.  As she knew roughly what I was going to make, it did mean that I had to make her a different one.

I had used this pattern before to make an easel card but this time I made the parchment pattern a little smaller and mounted it with small brads on to  a black pearlescent oval card that I cut out with Spellbinders.

I then mounted this onto some snow white Centura card and cut out the sentiment from Britannia dies.

The bow was cut out from the Die'sire Christmas Bow Die onto a Double Sided Self Adhesive Sheet and then put Golden Sand Silk Glitter onto one side and attached it to the card.

When my Mother saw the card she was really pleased so hopefully her sister will be too.

Thursday 28 November 2013

Workshop with Sheena Douglass

As I had not been on a workshop with Sheena for some time, I decided that it was about time that I went on one and so booked myself on her workshop in Milton Keynes.    I was not sure what projects we would be doing but knew that it was not paint fusion and was keen to see what techniques she would teach.
 
We ended up making two projects and a great time was had by all - especially with the appearance of Father Christmas - in a kilt!!  Not sure where Sheena's husband Russ disappeared to when Santa appeared!!
 
The first of the projects was a wall hanging.  We started out by covering a mdf plaque with Pebeo Studio Acrylics gesso in white so that it would take the stamping and then stamped with Sheena's A Little Bit Scenic Sea Scape stamps.  We then coloured the sea, sand and images with Distress inks mixed with Pebeo Matt Gel to ensure that the colours stayed on the plaque. 

We then coloured some Centura Pearl with Luminate silk paint - which is absolutely beautiful - and then stamped and embossed images from Sheena's A Little Bit Scenic Sea Shells.  These were then cut out and attached to the plaque which was then finished off with some ribbon.

The second project was a card and this took more time to do as we had to let the modeling paste dry before we could carry on.  We first covered most of the card with   Pebeo Studio Acrylic paint mixed with   Pebeo Gloss gel in three different colours to create the sky.  We then dabbed on Pebeo Studio white paint to create the clouds. 

Pebeo modelling paste was used to create the mountains and this was left to dry for a few hours before continuing with the rest of the card. 

The lake was created using distress ink mixed with the gloss gel.  The pink blossom was created by dabbing pink and white Pebeo studio paint onto the sky.  This was then stamped over with the Sakura stamp from A Little Bit Oriental with Black Stazon.

A lantern was stamped onto black card and embossed in gold, cut out and with 3D glue stuck on.

The card was then layered onto a few other layers.  The metal looking card was created with embossing black card and then adding Pebeo gilding wax which was absolutely lovely to work with and the effect was beautiful.

This was a great workshop and it was good to learn some techniques that I did not think of using but are very effective.

Monday 18 November 2013

Card for my Husband

I was not going to make a card for my husband this year as although I normally do not buy card, I could not resist one in the Spurs shop that was a pop up of the ground.  By the time I had seen it, I knew that I was not going to be able to make one as good in the time so thought that he would have to have the shop bought one.
The night before, I decided that he would be disappointed without having his own hand made card so relented and decided to make a quick one for him.  I used Marianne Collectables die to cut out the shirt, shorts and ball in the correct colours and then stuck on the logos that I had printed out and cut to make it look more like the actual kit.  

I used a dark blue stardream card for the card base and mounted a white pearl card ont this and also used Spellbinders Lace Doily motifs - which for some reason does not look too girly.  I then added the Happy Birthday cut using Britannia dies to finish.

He was pleased and although loved his card from the shop - loved this one just as much and admitted he would have been disappointed without a card made by myself.

Tuesday 5 November 2013

Mothers Birthday

I had seen this Peel Off transfer in Hobby Lobby whilst on holiday and just had to get it to make my Mother's birthday card.  It is by My Mind's Own and is part of the bohemian range which is now discontinued.  Usually I do not like these but these one really caught my eye. 

I attached tape around the edge of the base card and put gilding flakes on.  I stamped the side borders using Just Rite Classic Lace Edges 1 and instead of ink I used Cosmic Shimer Flake and Glitter glue and the put gilding flakes on this also.

Using Spellbinders Enchanted Labels 28 cut out the background in patterned tan card and then attached the transfer to some plain card and cut out using the second largest Spellbinders 5x7 Detailed Scallops.

I then pushed some netting through a ribbon slider to finish to card.

Tuesday 29 October 2013

Jayne's Weekend Workshop - Part 2

I started the second day of Jayne's weekend workshop with a swim first thing in the morning which was a nice way to start the day. 

Day Two was going to see us make two of the remaining projects. Each group had voted on the previous evening to see which two of the remaining three projects that we were going to complete as we would not be able to complete all three.  Our group had decided to make the gift box and the Calendar. 

As both groups had chosen to make the gift box, this was done together with both groups and the tea lights were supplied to us by Jayne to complete the box.  The gift box holds 6 tea lights and it could be used to put chocolates in instead of tea lights.  

It was made with Kraft card and the use of the Hougie Board and Spellbinders 2010 Heirloom Ornaments.  Acetate was used to make the window and also a compartment on the left side to hold a tag, which was a nice idea.  It also had a tab on the side of the box which was pulled to undo the box and put it what you wanted.  As it was in red and white, this was not my favourite project of the weekend though.
The next project was the calendar and this was one project that I really liked. It was mounted onto Kraft card that had been distressed to look like wood.  The focal point was made using Jayne's Winter Foliage stamps and distress inks.  The only extra stamp that was used was Inkylicious Worn paint stamp which was used to create the wooden effect in the background.  I just loved the look of this project and although I am not really into the folk art look – this did it for me.

It was a great weekend and the company was really great.  The hotel and staff were great which just added to the weekend.  Hopefully this is the first of many more crafty weekends with Jayne and Helene.


Monday 21 October 2013

Jayne's Workshop Weekend - Part One

I spent a lovely weekend last week in Crick at Jayne Nestorenko's workshop.  It was certainly a weekend of fun, crafting and food.  It was good catching up with everyone and a couple that I had not seen this year.
We managed to complete 5 projects of the proposed 6 projects and in my group we made a gift bag instead of a lantern.  Our first two projects were made with Jayne.

The first card was made using gilding flakes which we then embossed and one of Jayne's new stamps especially designed for this workshop which I coloured using Copic pens.  We also added a ribbon border using stamps and embossing powder. 

The next project was a gift bag and again the image used was another of Jayne's stamps which she had designed for this workshop. 

We thought that it was going to be easy and that we were just going to colour our image (which again was coloured using copic pens) and then matt and layer this onto a bought bag but we should have known better and that Jayne had different ideas - we were going to make the bag up from scratch.

This was easier said than done but in the end we all got there and succeeded in getting our bags made . 

The final project of the day was made with Helene - and again we  had the honour of working with some more of Jayne's stamps.  Jayne had ended up making 4 stamps for use with her workshop and on this card we used 2 of them as well as some stamps from Jayne's Winter Foliage set.

As this was a workshop with Helene, the were obviously going to be use of distressing inks and Helen really excels with this.  The card from was from a bought card blank which we coloured with distress ink around the borders and on the ivy.  We then cut into the ivy so that we could place our embossed white background. 

We then embossed the pattern using That Special Touch Mask Snowflake Frame and lightly distressed the raised pattern.  This had to be done very lightly and in the words of Helene "as light as a fairy's fart".  I guess this summed it up great!

Using distress inks we then created the scene inside of the frame and once this was done, glittered the frame.  This was then attached to the background and we then added the snowtree which had been painted with distress ink and lightly glittered.

Monday 7 October 2013

Anne's Card

This card was made for a friend and I was hoping that I would get it made in time for her birthday.  As usual, time just seemed to run out but I managed to get it made and posted in time.

The background was embossed onto tan card using Spellbinders M-Bossabilities Garden Lattice. I attached some ribbon that I had in my stash and some flowers that I had from www.wildorchidcrafts.com.  The "happy birthday" words were cut out using Britannia Dies.

The image was from Crafters Companion Frou Frou and was coloured using Spectrum Noir Pens and then cut out using Britannia Lattice Edge die. 
To finish, I stuck letters on the side to create my friends name.

Friday 27 September 2013

Jayne's September Workshop

I had wanted to be able to post these cards before now but just after Jayne's workshop I had a holiday in Germany and therefore did not have time to post these before I went. Although I had finished two of them, I had not quite completed the third.

As before, Jayne split her workshop in two and I did the first half of the workshop with Jayne.  Jayne had decided that her workshop would concentrate on technique rather than a completed card and she taught us the painting technique with H20's.  We were still given the card and prepared some of the card, but we were to concentrate on the painting rather than finishing the card.  The finishing could be done later at home.  The Stamps used were Jayne's Just My Imagination Christmas Holly & Berries Spray and Christmas Poinsettia Spray.

The second part of the workshop with Helene  concentrated on using distress inks.   Helen has some great techniques that she imparts and her cards were fun to make.

The first card was made using a resist technique with a Sakura Clear Gel Pen and just two colours of distress ink.  Jayne's Just My Imagination Christmas Stamps Reindeer Trio and Birch Trees were used to create this card.  To finish, I just put Silk Glitter around the edges and then mounted it onto Centura Card.

The second card used just one colour of Distress Ink and the stamps that were used were Jayne's Just My Imagination Christmas Stamps Reindeer Trio , Birch Trees, Evergreen and Winter Foliage.  This could have also been done with two colours to achieve a different effect but I liked the Sepia look and chose to use just the one colour.

I really enjoyed this workshop as Jayne and Helene come up with some lovely cards and techniques and I can't wait to see what they dish up on the weekend workshop next month. 

Tuesday 17 September 2013

Parchment and Peeloffs


This was a quick and easy card to make using parchment and peel offs.  It is an ideal card to make if you do not have a lot of time as it is one of the quickest parchment cards.

I used a large silver peel-off  which I put in each corner of the card and then coloured behind each flower using Dorso crayons.  I then added texture to the flowers by lightly embossing from behind using very light strokes.
 
I then embossed each patterned square on the border and on the solid sqaures pierced using a grid behind.
 
I then cut away the parchment paper from the large flowers and put a pearlescent paper in as an insert.
 
To make this card even quicker, I could have left out the cutaway.

Friday 6 September 2013

Pauls Cards


Yet another male card that I have had to make - this should be the last for a while.  After making a few female cards if was obviously time to go back to making a male card.  This was for my nephew's birthday.  He is now at that age that seems even harder to choose a design that is suitable. 
As usual, I had left this to the last minute and was then a rush to make and send to him.  I just never seem to get the time to make the cards in advance.

The bottom border was made using my new punch that - EK Success Large Edger Le Argyle.  The background paper was some I had picked up in the US and I stamped some images on to this and added some Tim Holtz embellishments.  The hessian was also from the US and I just halved it to make it the size I needed and then added the sentiment that I had cut using Britannia Dies.


Monday 26 August 2013

Another Bearly Mine Challenge


I enjoyed the last challenge so much as as it is a bank holiday weekend, have had enough time to take part in this weeks challenge.

I have used a paper from the Steam Fantasy range as the background and then matted some Opal Core'dinations.  I have then matted some papers from Vintage and Christmas Wishes.  It is nice to be able to use the Christmas papers other than for Christmas.

The image is  Saturated Canaries Lilliana which I have coloured with Spectrum Noir pens. I then cut this image out with Spellbinder Labels 26 and went around that with Broken China Distress in k.  

I used a Martha Stewart punch to create a band across the card and for the flowers used netting in a ribbon slider and then joined the edges to create a circle shape.  With a Spectrum Noir pen I went around the edge of the netting to make them stand out more.

The sentiment was from Jayne Nestorenko's Patchwork Polly series and then cut out with a dies from Spellbinders Opulent Opals.

Saturday 17 August 2013

Blue Square


This is a quick parchment card to make but does not look like it.  I first drew the octagon onto the parchment paper with gold tinta ink and then using a two hole tool went around the outside and then the inside of the border and then cut the outside of the border to form the card shape. 
Then on a square piece of parchment, drew the border and cross hatch and then coloured the parchment using Dorso crayon.  I went around the outside of the card with a semi circle tool and cut away and then embossed a small dot in each semi circle of the border.  Using a grid, I perforated using each hole on every other square to form a pattern.
I drew two flower petals with gold tinta ink and on the bottom one, again using the grid pierced the parchment and on the second one I stippled the petals.  This is done by first lightly embossing the petal and then with a one hole tool, lightly stabbing to form a frosted pattern.  I then cut these out using a two hole tool and added some ribbon and layered my pieces.
I then put an insert into the card that was slightly bigger and cut around with decorative scissors to finish.

Sunday 4 August 2013

Bearly Mine

I have not made a challenge card for quite some time but when I saw this challenge on Crafty Julie's blog, I wanted to join this challenge.  It was also an excuse to buy some more digi papers. 

The background paper was Bearly Mine Just Plaid and I also used Bearly Mine Floral Breeze.

The image was Little Darlings Blanche rubber stamp and I coloured this with Spectrum Noir pens.

I also used Spellbinders Grateful Lattice, Spellbinders Gold Circles One, Cheery Lynn French Pastry Doily and Martha Stewart Diamond Fence Punch.

The flowers were from Wild Orchid Crafts and the ribbon was some that I had in my stash. 

Sunday 28 July 2013

18th Birthday card for my Niece

 I can't believe that my niece has reached her 18th birthday.  It doesn't seem that long that I got the news that she had been born whilst I was living in Australia.  I won't forget that day as I had just got back from taking my Father to hospital and was pleased to get some good news - and my Father made a full recovery.

I decided to make her a double easel card and wanted it to be large so used an A3 Sheet of card that I cut down.  I used two rubber stamps images from the Crafters Companion Frou Frou range and coloured them using Spectrum Noir Pens.  I stamped and coloured the tray to stand out more. 

The background was Core'dinations cardstock which was embossed with Spellbinders M-Bossabilities Garden Garden Lattice and the sentiment was made using Britannia dies.


Friday 19 July 2013

Billy's Card

It seem to be the time of the year when I need to make quite a few male cards and this is the one that I made for my cousin. 

I always like to make him something special and this year decided on using some of the Stampscapes stamps that I had bought at Alexandra Palace in April.

I used Ranger Adirondack ink to stamp the sea, lighthouse, rocks and boat.  I used a mixture of 3 colours to get the variation (denim, eggplant and black) and then went over lightly with sailboat blue.

I then brayered the sky with lemonade and citrus ink using a mask over the lighthouse and boat and added the branches and birds to give depth.  The clouds were stamped with Sunset Orange, Cloudy Blue and Watermelon

I then added a sentiment from Making Cards for Men 2013 magazine which I mounted onto gunmetal mirri card and attached with a large brad and added the ribbon.  

I then mounted the card onto gunmetal mirri card and then onto a blue card to finish.


Sunday 7 July 2013

Jayne's Workshop

It has certainly been a busy last few weeks for me.  I had a 15 night holiday in Califonia staying in Anaheim and travelling to LA and San Diego for day trips.  What with standing in lines at Disney and stuck in traffic jams on the way to LA and San Diego, the holiday seemed to take it out of me.  I did managed to get to some craft shops though and found a great place in Tustin called Wooten's Scrapbooking that was recommended by Sue Wilson and it was fantastic.  I certainly did some damaged to my purse there as they had some lovely papers.  It was a good job I took an empty case with me so that I was able to fill it up with all my craft purchases.

Helene showing her techniques

I hardly recovered from the holiday and jet lag when I was getting back in the car to go to Jayne Nestorenko's workshop - and it just happened to be the day of the British Grand Prix - not a good day to be on the M1 - I got stuck in more traffic jams - it made me wonder if I was back in California!  What was even worse was it was such a nice day as well and I hoped I was not missing out on Summer!

Jayne explaining


It was well worth the time stuck in traffic though as the workshop was superb, as usual. 

Jayne had a new format for this on - we were split into two groups.  One group spent the morning with Jayne and the other group the morning with Helene.  In the afternoon we swopped over so each group did both projects.  It was good to catch up with everyone as it is really a great crowd that go on Jayne's workshops and new people are always made to feel welcome.

We were using one of Jayne's new Stamp sets which was based on Venetian Masks.  Although the same stamp set was used for both projects - they were both completely different and it definately felt crazy making a Christmas Card on a nice hot day. 
 
I was in the grioup that made  Jayne's project first and there was more choice with variation on this one.  We got to choose the colours that we wanted for the mask and for the background paper which we made.   
 
I also made mine slighty larger than most by leaving space at the edge that I could put my butterflies on rather than on the background paper.  I did not quite finish this at the workshop as I knew that I wanted to put the tears on and did not have them with me.  Although I did not think that I would like this card at first, I very quickly got to love it.
 
My next card was the Christmas one and I thought that Helene came up with a great idea for this and that it is really stunnig and different for a Christmas card.  I felt that it really captured the Snow Queen look and it is so much better than it looks on the photo.
 
Even though I was tired, this was a workshop that I was glad that I did not miss and it was nice to catch up with Pat.  You can see here the cards that she made at this workshop http://patscardmakingpassion.blogspot.com/2013/07/still-waiting-for-summer.html.


Saturday 29 June 2013

White on Black

I seemed to have found a new vigour for making whitework cards in parchment and enjoyed making this one.  It has a little more cutwork than the last card that I made but again when black card is placed behind, makes a card that really stands out.  I first traced the pattern with white tinta. 

I then pierced the pattern at the top of the card using an easy grid and also the pattern where the cutwork would be.  I then embossed the folowers and hearts on the pattern and where I had lightly embossed, I then stippled to give it a textured effect. 

Once all the embossing had been done, I then cut out the crosses and then using a two hole tool, perforated around the edges of the flowers and cut away the excess to complete the cutwork.

I then added a black card as an insert to finish the card.

Tuesday 18 June 2013

Wedgwood Visit

I have always loved Wedgwood plates and went to visit the Wedgwood Museum on the way back from a football match recently. As it was a Sunday we were not able to go into the factory but they still had a demonstration area where various aspects of decorating pottery were being demonstrated.

I had asked the demonstrator that was decorating plate with enamelling whether it was a job or a hobby for her - the answer was both - and we got talking and I mentioned that I was a crafter.

I was quite surprised when she asked me if I would like to try it.  I was expecting to go into the middle of the room and try and one of the items that you can decorate and then get sent to your home but instead I was told to sit at her seat.  She loaded up the brush for me and I then proceeded to decorate some of the plate.

I must admit that it was very relaxing and that I really enjoyed it.  Lucky I had my husband with me the take a photo of what I was doing.  It was also nice that the demonstrator said that I had done it well.

I can't see myself doing it again as after each colour the plate has to be fired but it made a nice change to go away and still do something crafty.

There were some wonderful pieces of pottery at the Museum and I can certainly recommend it as a worthwhile place to visit.

Friday 7 June 2013

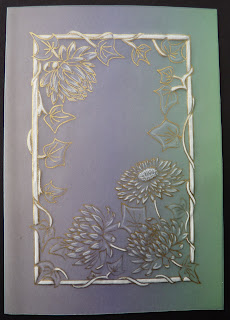
Dandelions and Ivy

This card has no cutwork on at all but it just whitework, tinta and dorso.  This card is very quick to make as the embossing takes the longest and there is not too much of that on this card.  The colouring and tracing are very quick.

Before tracing and embossing, I coloured from the reverse of the card using Dorso crayons to create the two tone effect background.  This needs to be done first to ensure that the colour does not come through onto your whitework.

The pattern was traced out in Gold tinta ink and the embossed from the reverse.  Apart from ensuring that the border was really white, the whitework is only light on the petals and leaves.

Thursday 30 May 2013

Perfect Day

I just loved the release by Crafter's Companion of Crisalis Classics  Stamp Sets and just had to use this one which is Perfect Day.  I thought that I would colour it this time using my Twinkling H2Os which I had not done for while. 

I was pleased with how it turned out and  like that fact that I had the colours to give her an olive complexion, which was just as well as I realised that I did not have any other skin colours - which has now been rectified.

I cut my image out using Spellbinders Gold Labels 4 and the coloured around the edges with Spun Sugar Distress Ink.  Using pink card, I cut out using the larger size of Gold Labels 4 and attached it and the image together with pink ribbon and then mounted this onto some card that was first matted with a matt gold and then plaid background.  The plaid paper is from one of my many Crafters Companions CD, I can't remember which one it is from though. 

I then added pink corners cut out from from Shapeabilities Gold Corners One and also the greeting from Gold Labels 4.


Wednesday 15 May 2013

A is for ...

I like the idea of monogram cards as I think that they really personalise the card.  I made this one just really starting with the first letter of the alphabet and that I also have friends with this initial.    Again, it is a really quick card to make with very little whitework or cutouts.This is one of the quicker parchment cards to make.

This was traced with gold ink and coloured with dorso crayons behind the monogram and Perga Color Exclusive for the pattern and between the patterns on the edging.  The colouring was put on the reverse side of the parchment paper and also the embossing of the edging. 

Then, using a two hole tool, I pierced around the edging of the card - except for the spine - and cut the excess away to form the edging.


Wednesday 8 May 2013

Blue Flowers

I really enjoyed making this card as it is mainly whitework with a little colouring just to give it that hint of colour. Although it is quite a simple card, it does take a little longer to ensure that the whitework is correct.  I find that you need patience to ensure that you do the whitework correctly as if you rush, you can end up spoiling your work.

The flower pattern was first traced with a very fine line using white tinta ink. It is important that the line is extremely fine so that it does not deflect from the finished work.

I first coloured the reverse of the flowers with a blue dorso crayon and then embossed from the reverse which ensured that the whitework stayed white.
 
I then drew the outside border in gold tinta ink and then embossed between the pattern and with a two hole tool, pierced around the outside border and then cut away to finish the card. 


Tuesday 30 April 2013

Forever Blowing Bubbles

I seem to have too many people that are West Ham fans and it is getting harder to think of ideas that incorporate both football and their colours.

I had this stamp which is Flippin' Stamps football and coloured it using Spectrum Noirs in West Ham colours.  Although I used their colours, I wanted to make it just a little different so did not copy their shirt exactly.

I then cut it out using the Spellbinders A2 Distressed Edges and coloured the edging with Distress inks in Salty Ocean and Seedless Preserves. 

I then mounted this onto some Core'dinations card that I had embossed using the Crafts Too Football embossing Folder.  This was then mounted onto more Core'dinations card and as I did not have any ribbon that was the right combination of colour - put one of top of the other to create the colour scheme I wanted.  It also looked masculine in those colours.

As soon as I saw the Angelica and Friends - Felicity Stamp Set by Crafter's Companion that I had to buy it as it had the phrase "Forever Blowing bubbles" and I knew that I would get a lot of use out of that phrase.  I stamped it out onto on to card and also added Happy Birthday and then using one  of the smaller Labels 4 spellbinders, cut it out to form my sentiment.


Friday 19 April 2013

Birthday Flower in Parchment

I really love making parchment cards with just white work and a touch of gold so when cleaning out my craft room, I found this pattern in one of my old magazines and knew that I just had to make it.

I also wanted to make something that I could take on the plane for the short trip that I was making to Switzerland for a couple of days and that I could do at night in the hotel.

I made the topper first. I traced the pattern with white tinta ink and used gold tinta ink on the ribbon edges. I then embossed the flower, ribbon and edges and then using a two hole tool, went around the outside edge and perforated, and then cut the oval topper out.

With black card, I cut out the background using Spellbinders Grand Decorative Ovals One.  I then mounted the topper onto this using small gold brads.  I then cut out an oval in black card using Spellbinders Grand Ovals and attached this to the back of the topper to hide the back of the brads.  I then mounted the topper onto a easel card I made with Grand Ovals and cut a smaller oval in white to mount my greeting and stopper onto.

The greeting was from Party Paws - Bamboo Rubber Stamp Set by Crafter's Companion which I felt worked well with the topper.


Wednesday 10 April 2013

Male Card

I always hate having to make cards for males as I find it so difficult to find elements that are masculine and not sport or cars and was so glad when I saw the JustRite Going Places Vintage Labels stamps being demonstrated by Sue Wilson.  I had seen Sam Poole show a card using the background stamp and the letters and decided to put the two together to make my card.

I stamped the background onto white card with Versacolor black using the U-Mount Newsprint A6 Rubber Stamp by Sam Poole and mounted this onto black and then white card. I then stamped 'Happy Birthday' onto cream card with Versacolor Sepia using Clear Vintage Alphabet A5 Stamp by Sam Poole. I cut out the words separately and went round the edges with a mixture of Brushed Corduroy and Rusty Hinge Distress Ink. I then mounted this onto the background.


I stamped the image from the JustRite Going Places Vintage Labels in Memento Rich Cocoa and then coloured using Spectrum Noir pens and mounted onto the card to finish.

Thursday 28 March 2013

Butterfly Carriage

I really enjoyed making this card and it has the added bonus of having ribbon threaded through the bottom.  Again it is a card that can be made reasonably quickly for a parchment card.

I traced the pattern onto the parchment with white and gold tinta ink.  I then coloured the pattern from behind using Perga Exclusive pens and then embossed from behind.

I also embossed the pattern on the border and then perforated and cut the border pattern.  I then threaded blue and pink ribbon through the top of the border pattern and cut the side edges of the card with decorative scissors to finish.

Sunday 17 March 2013

Bat Mitzvah Card

My husband and I had been invited to a Bat Mitzvah and I decided that I would try and make a card as it was going to prove difficult to buy one.  I had not made a card for a Jewish occasion before but as there did not seem to be much choice around, thought that it was something I would enjoy to try.  I tried looking on the internet for ideas but there did not seem to be too much out there.

I had previously picked up some background paper that I could use on one of my trips to the US.  It was a double sided and I was able to use both sides. 

I first cut out the background using the new Spellbinders die Enchanted Labels 28 to get the Mazeltov showing.  Then using the other side of the paper, cut a label from the JustRite Vintage label and banner die set with the largest size and then cut a label in blue card with the smaller size die. 

These were all mounted onto Centura card and then using my craft robo (which I has not used for about 4 years!) cut out the Star of Dav id shapes for the corner and also the words "on your" and "Bat Mitvah" and mounted these.

The recipient of the card liked it a lot and I know she certainly did not have two of these.

Wednesday 6 March 2013

For You Parchment

This is a card for some special.  As with a lot of my parchment cards, it is quite an easy card to make although just takes quite a long time compared to other cards.

The envelope, note, butterflies and yellow flowers have all been 3D onto the card.  I first traced the design onto the parchment paper and embossed the flowers and leaves.  For the centre of the flowers I used Pergamano Pintura Paint in yellow to highlight. I then made a small envelope and notelet and embossed "For You" on it.  I then attached these to the card.  I then coloured a piece of parchment paper yellow and cut out the butterflies and lightly embossed them.  Then with a flower punch (which I found when cleaning out my craft room), I punched out some flowers with the same coloured parchment and added them with the butterflies to finish the card.
Although as yet I have not put an insert into this card, when I do I will ensure that insert has the top right and bottom left corners cut off so that it does not show under the cutaway section.

Wednesday 27 February 2013

Card for Mother-in-law and friend

As my Mother- in-Law's birthday and a good friend’s birthday are within days of each other, I decided that this year I would make the same card for both of them.  I was just hoping that the stamps were going to arrive on time for me to make the cards otherwise I was going to have to think of another design and luckily for me they did.

I used the JustRite Violette Vintage Labels cling stamp set to first stamp the topper onto cream card which I then coloured with Copic pens and some of the background with Distress Ink.  Then I cut them out using the JustRite Vintage label and banner die.


I stamped around the edge of the card also with the Violette Vintage Labels set and also coloured with Copic pens.  I then made the background using the Couture Creations Embossing Folder Tied Together on a purple Stardream card.  I used purple ribbon down both edges of the background paper and on one side put a bow and on the other put a strip under that has 'Happy Birthday' on.  You cannot see it very well it these photos.


I cut out the sentiments from the Britannia dies and mounted these onto Spellbinders Framed Tags 1 for my Mother in Law and onto Spellbinders Ribbon Banners  for my friend and then mounted these on the cards.