Saturday 1 November 2014

Husbands 50th

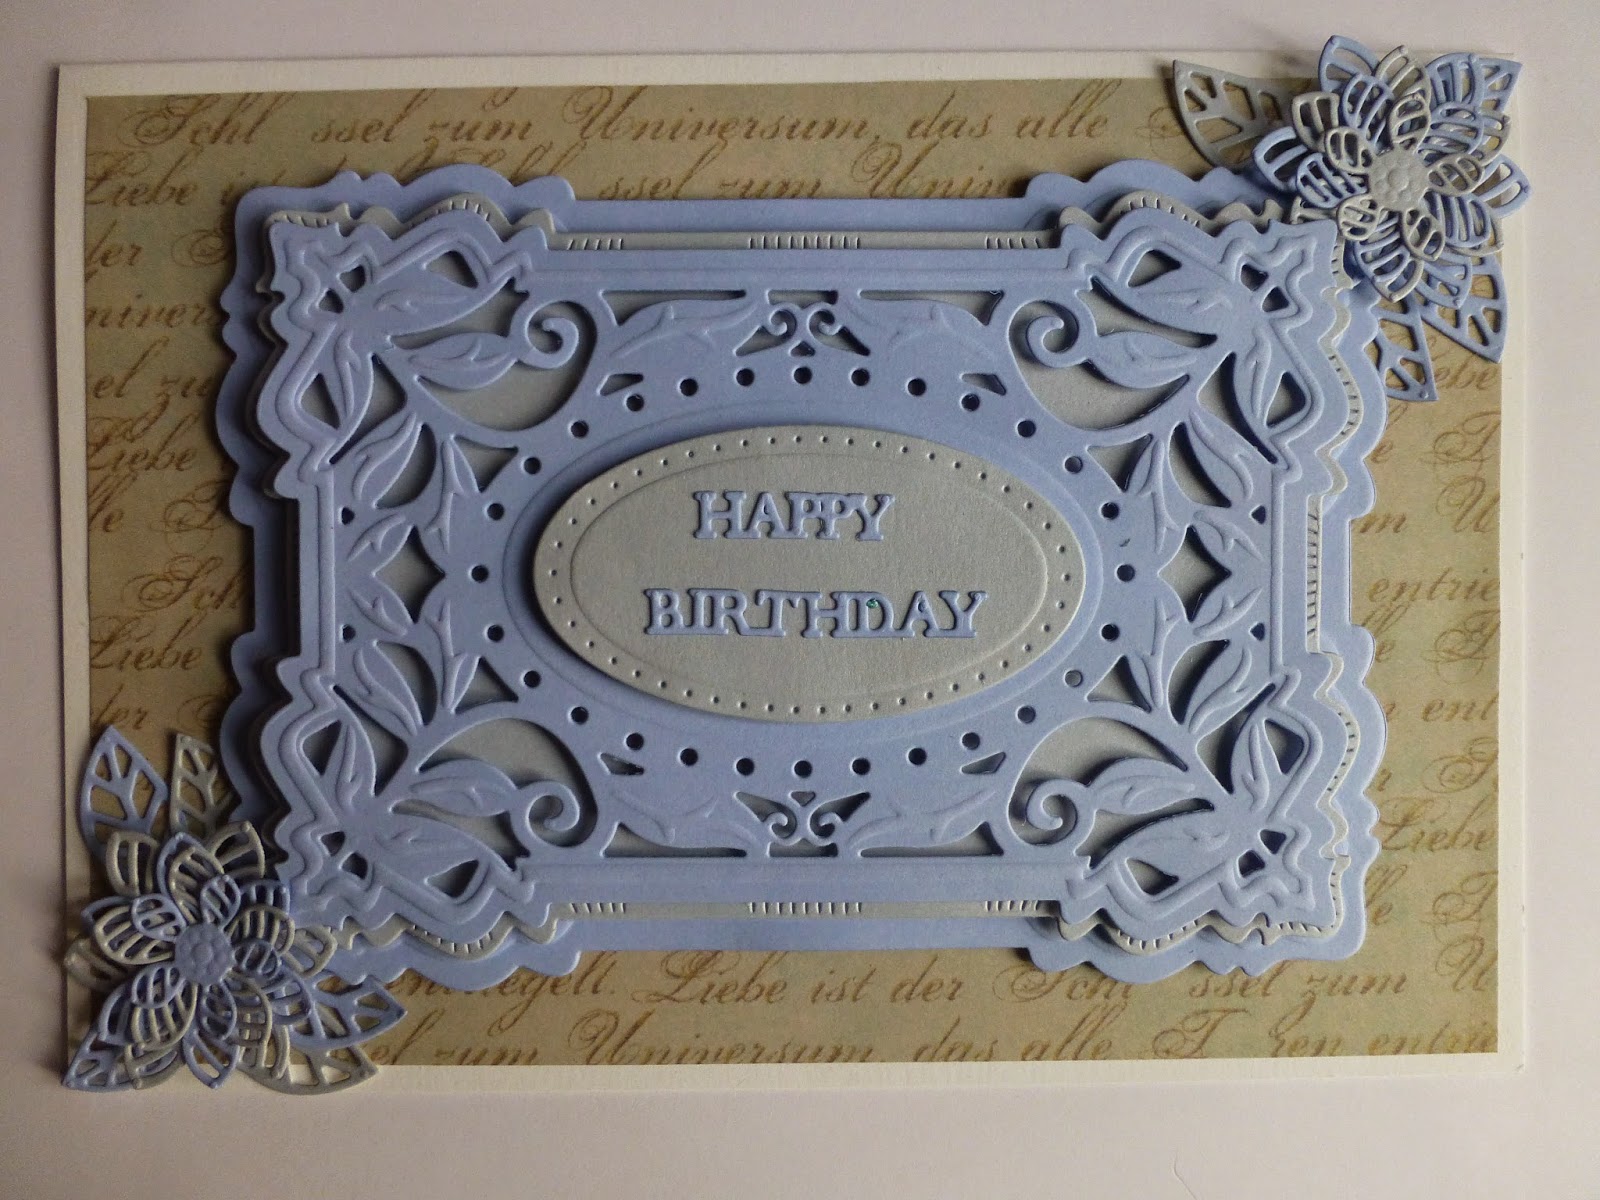
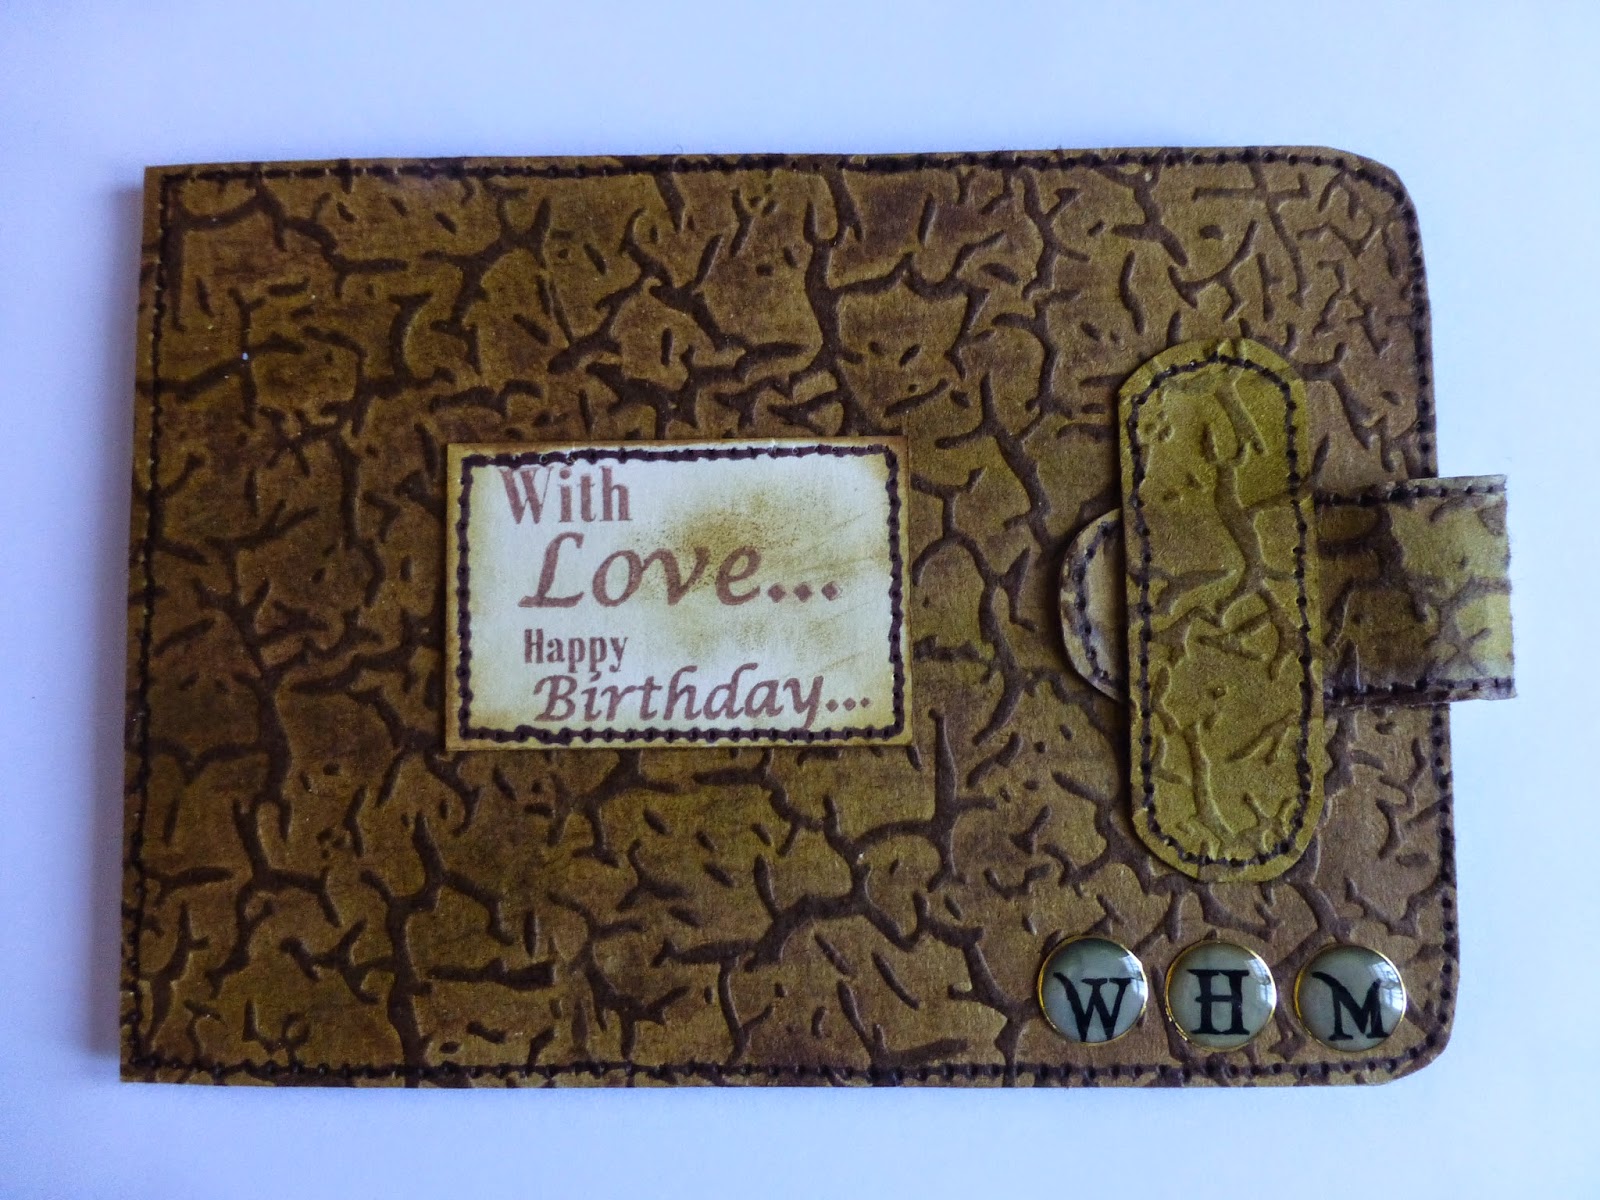
This year I actually got my husband's birthday card made early - which was just as well as I do not know where the time has gone this year. I can't believe that we are 10 months through the year and it certainly has not been one of the better ones so may be it is best that it is going so fast.
 
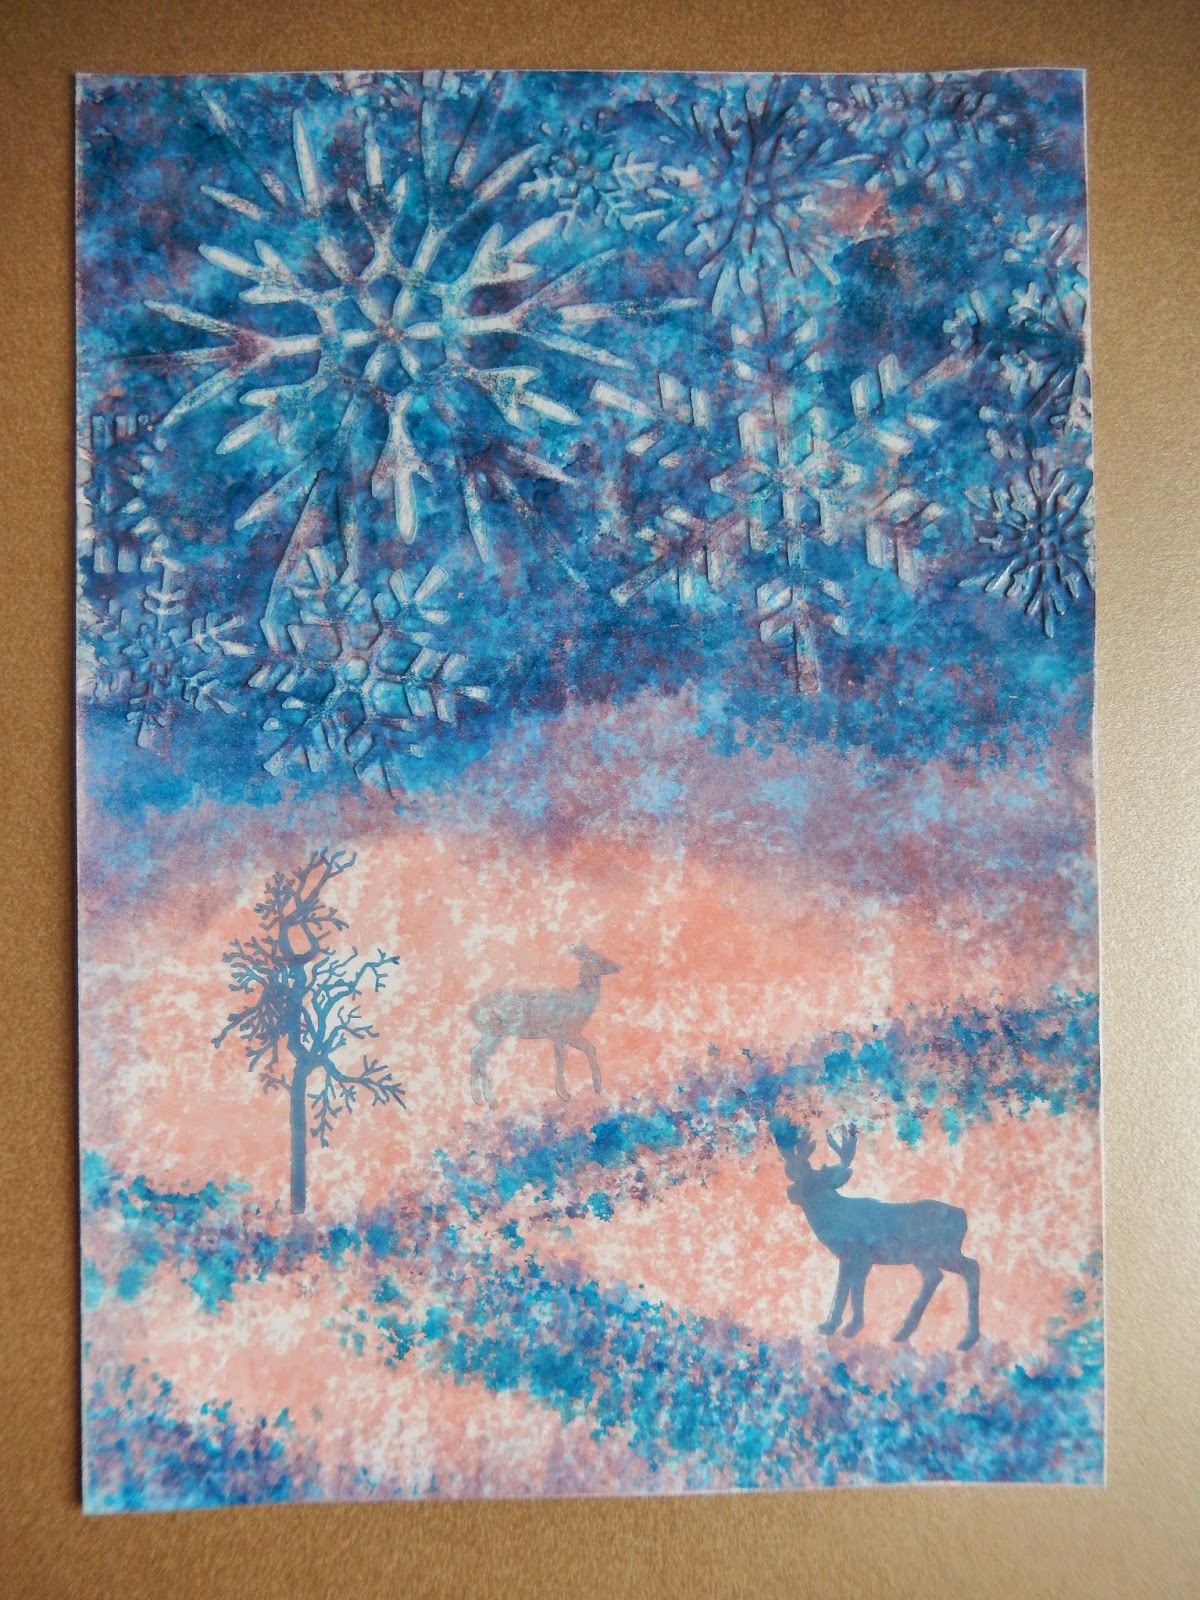
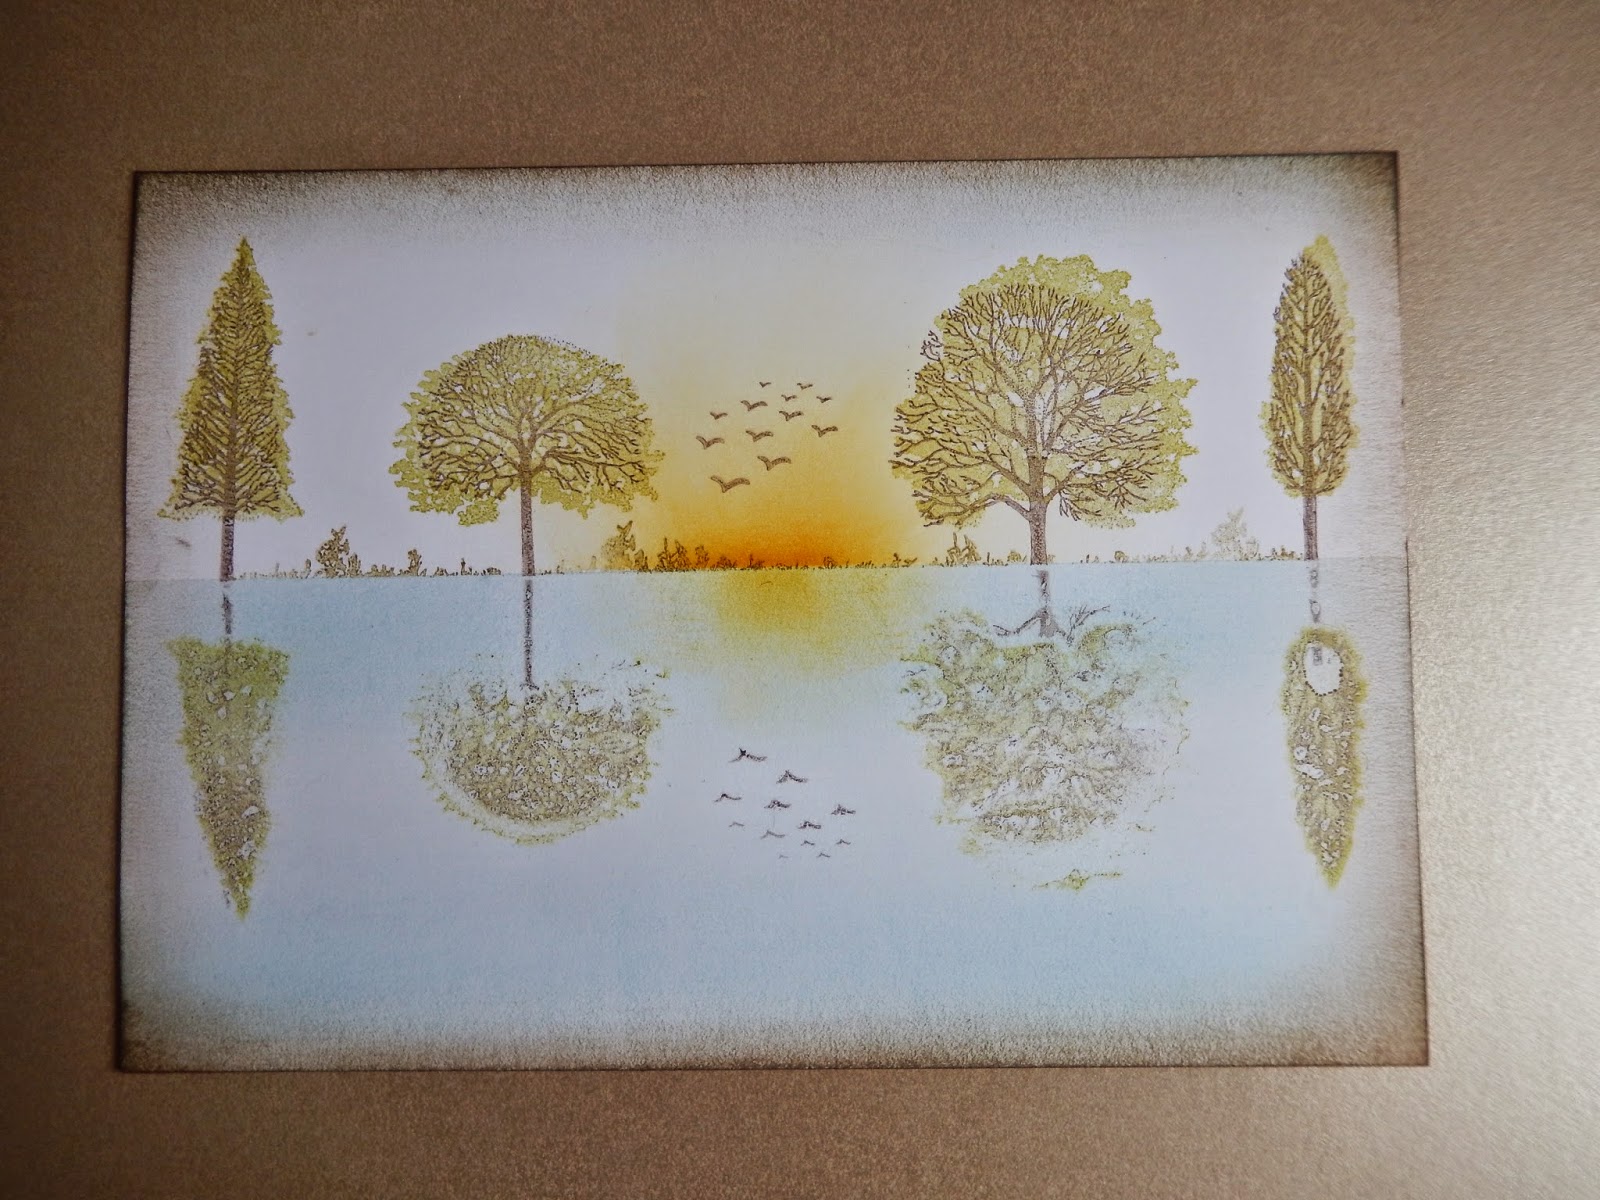
I decided that I would use the Monument Valley Mask from Clarity Stamps as it was a place that we both really loved and will be going back to again. 
 
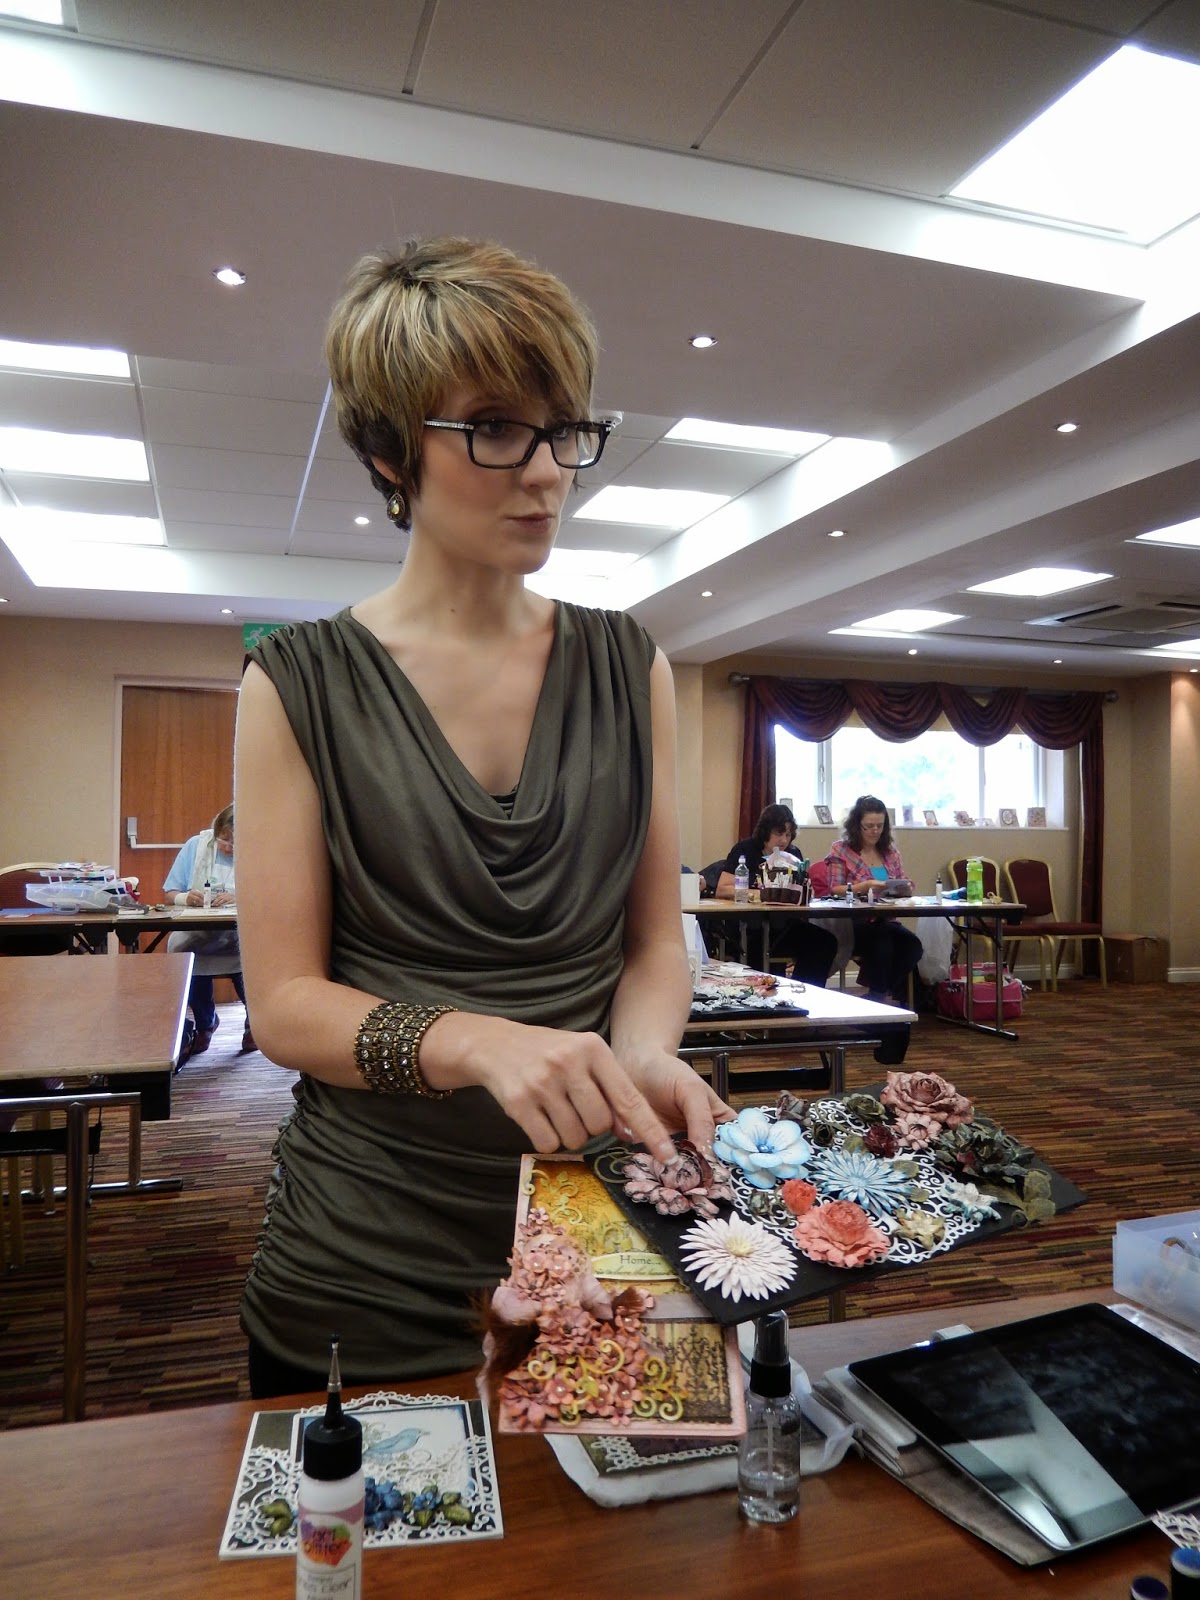
I used some of the techniques that I learnt on the Clarity Workshop that I attended and it was nice to think that I was putting them to use. 
 
I used Adirondack ink in various colours to get the shading of the valley and also to get the sky, greeting and panel.  The panel at the bottom and the greetings were also created using Clarity Stamps.  I mounted this onto some Gemstone Core'dinations card and the base card was Centura Pearl.

Tuesday 21 October 2014

R.I.P. Uncle Bill

I don't usually make Sympathy card as for some reason it never seems right but I broke this rule for my Uncle's family. 
 
Uncle Bill was a special person to me - I grew up going on holiday with him, my Aunt and his children and we were always close.  Even though he lived in Scotland, he still come down south for all family events.  I was even lucky enough that he and my Aunt visited me when I lived in Darwin - even if they were actually staying in Brisbane and flew to Darwin just to be with me.
 
I'll miss my chats about football with him - he always knew what my team was up to and how they were doing.  He had a great sense of humour and certainly had a way with words.
 
 I wanted the card to be simple and the words inside to mean the most and  I was going to make 5 - one for my Aunt and  his four children - whom I have always been close to. 
 
I used black American Seam binding on the front with Spellbinders dies for the topper and Joanna Sheen's Signature die for the sentiment.  I particularly wanted the cross as it meant so much to him.
 
It was a lovely day in Scotland for his funeral and I reckoned that the Sun had just come out for him.
 
I will miss him and my thoughts are with his family at this time - I guess there is another star shining brightly in the sky now.
 
R.I.P. Uncle Bill


Friday 10 October 2014

Card for my Mother


 I decided to adapt one of the cards that I made on the Heartfelt Creations workshop for my mother and her sister. 

I usually make one for my mother and then make one for her to give to her sister.  This time I choose different colours to make them a little different

As their birthdays are a couple of months apart, I can't post until after my Aunties birthday has passed.

I used some background papers that I had in my stash rather than Heartfelt Creations paper and made wanted to make an A5 size card rather than the smaller one that we made on the workshop.
 
I stamped  Vintage Floret Frame onto parchment paper using Adirondack Snow Cap ink pad and then cut it out  Decorative Leafy Frame.  I coloured the leaves and flowers on the back with Copic pens. 
 
I then stamped out Arianna Bloom onto parchment paper and also coloured that with copic pens and then shaped the petals and used a flat back pearl coloured with the same copic pens.

I used a LOTV sentiment and added ribbon to finish. 


Tuesday 30 September 2014

Clarity Workshop Day 2


This was the last day of workshops that I would be doing this year so I hoped that I would really enjoy it. I was not disappointed and apart from one of the cards, these would not be what I would normally choose to do so was pleased that Barbara was making me think differently as I actually ended up really liking them.   We even got another visitor with one of Barbara designers dropping in with her new baby - that just happened to be wearing a t-shirt with Clarity Stamps emblazoned on it - nothing like starting them early!
 
Todays projects started off with using make up sponges, masks and just one colour which was Adirondack black.  This was my favourite project of the workshop - I absolutely loved this effect and was surprised how quickly you could achieve this effect. 

The second card was using three different alcohol inks on embossed glossy paper and was perhaps one of the hardest techniques to achieve.  Sandpaper was used to make the embossing stand out. 

The third card was using the gelli plate and although I started off not really liking it, ended up quite fond of it.  I especially liked adding your own scene to the blank canvas.  We used distress ink pads with a brayer and blending mat.

The fourth card was again using the gelli plate with acrylic paints.  We needed to use  three layers of the paint on the gelli plate at the same time to achieve this look - and also some bubble wrap was used.

To end the workshop, we got to play - I mean practise!-  using shaving foam and distress inks.  Great fun was had by all.

Barbara run a fantastic workshop and I found that Paul Church is such an expert when it comes to double stamping without getting double lines as some of the ladies found out.


Monday 22 September 2014

Clarity Stamps Workshop Pt 1

I have certainly been busy with workshops lately.   I have managed to get 5 days of quality crafting with some great company.  My latest has been a two day workshop with Barbara Gray of Clarity Stamps and this was yet another superb workshop and will blog in 2 parts again as we completed 4 projects each day - and an extra technique slid in at the end.


I had done a workshop with Barbara a few years ago but really liked the way this one was run as Barbara sat at the front with a projector and large screen behind her so that we could all so the same projects together.  Barbara showed us first and then we did ours with both her and Paul Church going around to make sure that we were all doing it correctly.
 
This one was not about finishing but purely on the technique although the finished samples could easily be turned into a card. 

I decided to just leave them as samples for future reference and not make them into completed cards.
 
I have always like the cards Barbara makes but they always look complicated and like a lot of practice is needed to get them right but this workshop proved that this is not the case.
 
We were also lucky on the first day in that Nigel May from Create and Craft was on holiday in the area and popped in with his partner to see us.  It was nice to see him and proves that he really has an interest in craft and crafters.

The first card was made by using a stencil and making our own stamp pad with distress reinkers and one of the things I learnt from this was how a greeting can be incorporated into the card by stamping the design under the greeting.

The second card was learning about borders and how you can leave a lot of white space but still have a great card and was using distress inks pads an archival ink.

The third was using stencils and how to change colours whilst using it and also using alcohol ink on acetate.  we used Adirondack inks with the stencil.

The last card was using the gelli plate and this was the first time that I had used one.  It certainly made it a lot easier to do a reflection.  We used distress ink rather than paints.

I was surprised how quick these samples were to make and I will certainly be using these techniques again.

Saturday 13 September 2014

Heartfelt Creations Retreat Day 2

I have finally managed to get the last of the photos together for the Heartfelt Creations Workshop.  I really did enjoy this workshop and must admit that there were a lovely bunch of ladies (and one gentleman) attending. 

Emma Lou and Richard were really lovely people and  really seemed to enjoy their job - if you can call that a job! I would certainly go on one of their workshops again.  I can see myself using the techniques that I learnt on both the workshop and the retreat.

I have not had much time to make cards lately as I have had some knitting that I needed to get done but am now trying to combine to both crafts and also trying to throw some quilting into the mix.

We used the Elegant Sweet Juliet and the Delicate Vellum Florals Classroom kits and my favourite was definitely the latter.  I thought that the delicateness of these cards was more to my liking but did like that both sets had a very different look.

These workshops and retreat were certainly worth the money and I would not hesitate to book them again.


Sunday 31 August 2014

Heartfelt Creations Retreat Day 1

As well as attending a Heartfelt Creations workshop, I also attended a retreat with them and Oyster Stamps and had a great 2 days.  The projects were fairly similiar to the workshop  in that they were trying to teach the techniques rather than cutting and layering but used different stamps sets and not all of the cards had flowers on them this time.

I though that the workshop organisation was really good - just a shame that the hotel let it down a little but was very impressed with Oyster Stamps - they certainly run a good ship. 

We used Sun Kissed Fleur and Cards from the Heart class kits and I must admit that this was showing Heartfelt Creations in a new light to me.

I was a first a bit apprehensive when I saw what we would be making as they seemed a kittle dark for me but by the end of the workshop I was certainly sold on them and will certainly be using their products and the techniques I learnt in the future.


Tuesday 26 August 2014

Mother's Present

I am feeling rather pleased with myself that I am managing to do a few of the crafts that I have not done for a while and this time it is knitting.  I used this pattern to make my mother a twin set some 25 years ago and it has now worn out so I decided that it was about time I got my knitting needles out again.
 
It seemed to take much longer than it used to but I guess I must be out of practice.  I used a Sirdar pattern and double knit wool for this and must admit that I enjoyed it.  It is also good that it is something that I can do on the train each day going to and from work.

The photos have not come out very well and they are actually the same colour, although they do not look it and I found it awkward to place to get a photo.  They are also looking rather creased as they had not been washed due to the fact that I only finished them the day before my mother arrived to stay with me for the weekend.  They do look better in real life.

She was very pleased to get it and absolutely loved it so the effort was worth it.

Tuesday 12 August 2014

Birthday in Blue

This card was made with Periwinkle blue and a metallic grey that I had in my stash.  Again I used Sue Wilson's dies as I have to admit that these are my favourite dies and they make such lovely and quick cards.
I have not had much time for cardmaking recently due to trying to get my mother's birthday present made as well as attending some workshops so to be able to make quick cards is just what I need.
This was for a friends birthday and I used paper from LOTV Beach Bliss pack.  I then cut out the topper in alternating colours using Sue Wilson's Spanish Collection Cordoba die and finished it with her Finishing Touches Faux Quilled Blooms.  The happy birthday was cut out using a Tattered Lace die.


Wednesday 30 July 2014

Heartfelt Creations Workshop Part 2

I have only just got around to taking photographs of the last cards that I made at the Heartfelt Creations workshop.  I must admit that I have never made 8 cards at a workshop before (especially as it was only 1 day) and I think it has taken longer to blog and photograph them than it took to make them!
 
The format was the same as before with the class kits but this time we used the Arianna Blossoms kit.

Again, we concentrated on the technique rather than the cutting and this time we coloured with Viva Décor 3d Stamping Paint.  I had never used this before but just love it. 
 
Although you cannot see it on the photos, it actually has a really shimmer finish with out being overpowering.  We just put a very little of the paint onto  sponge and then sprayed some water on it and dabbed it on to the flowers.  The colour that we used in the class was Carmine Red. 
 
I liked the fact that if you bought the paper pack, then the background of the card was already preprinted and just the addition of a couple of flowers and embellishment made a quick card.


Wednesday 23 July 2014

Card for 21st

I can't believe that my nephew has reached his 21st birthday - I don't know where the time  has gone.

He will be happily celebrating it out in the US as he is at college over there.  At least now he will be able to drink legally.

I layered some paper from Father Knows Best from LOTV onto Coconut White Foundation Card and bordered the paper with Gilding Flakes.  I then used Tattered Lace Champagne Glasses and Champagne Bottle dies to cut out my images and layered them both onto Coconut White card but coloured the bottle with distress ink.  I used Memory Box University and University Backgound to create his name and 21 and then added a Happy Birthday greeting using Tattered Lace again.

I had to get it done quick so that his sister could take it out with her when she joined him for his birthday and as seems to be the way at the moment, left it to the last minute.  At least he got it though as I could not send him a bought one.

Thursday 10 July 2014

Heartfelt Creations Workshop

I spent a lovely day on Friday in Kenilworth at a Heartfelt Creation Workshop. It was run by Oyster Stamps and the tutor was Emma-Lou from Heartfelt Creations ably assisted by her husband Richard.  Before Friday, I did have a few Heartfelt Creations stamps and dies but was not really getting the best out of them and had held of buying more until I had completed this workshop. I now feel that I will be able to use them a lot better than before.
 
The idea of this workshop was to learn techniques rather than spend time cutting and matting cards so the backgrounds and embellishments were already cut, enabling us just to concentrate on the techniques but still have finished cards.  This certainly worked for me.

The first collection we worked with was the Majestic Collection and we learnt how to colour the flowers and leaves quickly and then how to shape them in a few different ways.  We were only using distress inks to colour but we were putting the colour on with sponge daubers which did make it quick.  I have used a variety of tools for colouring before but never these daubers, but did like using them and will certainly be using them again.

I never realised that there were so many ways to shape one particular flower but we were certainly learning this on the workshop. It is amazing how just a little moisture can make such a difference to how the flower ends up looking.


We managed to get five cards finished in this session although the glitter did get put on at a later time.  I think that next time I make cards like this - I would make my own backings but I can understand why the backing were provided already in the classroom.


Saturday 28 June 2014

Birthday Card


This is the card I made for my brother-in-law's wife.
The colours are actually Duck Egg blue and Teal, although it doesn't show up too well on the photo.

The background paper is from LOTV Beach Bliss and I used Sue Wilson's Spanish Collection Seville dies cut out in alternate colours and her Finish Touches Filgree 3D bow.  The sentiment was from Tattered Lace.

As I made this just before going on holiday it was a nice quick one but just did not get time to post before going.

It has been good to get back home but has taken longer than I thought to get over the jet lag this time - must be to do with getting older!!

I also seem to have much more washing and ironing than usual as I was not able to do this whilst away - unusually none of the hotels I stayed at had laundry facilities that I could use.


Thursday 19 June 2014

Card for my Niece

I am posting this from my holiday in the US and this is the first time in days that I have had internet access.

We have been on a tour of some of the National Parks of the US and have had no phone, TV or internet - sheer bliss.

This is the card that I made for my niece's birthday.  I started with a Fresh Blue Centura card and mounted some Coconut White card that I had pierced around the border onto this.
 
I then mounted some Periwinkle blue card that I had embossed with Sue Wilson's Art Deco A4 embossing Folder.  I used Sue Wilson's California Frames A and Frames B which I layered in periwinkle and coconut white.  I used Britannia Dies Happy and Birthday words and the Niece from their Other Relatives Dies.

I cut out some shoes using Tattered Lace Platform Show and Memory Box Platform Pumps and used Periwinkle silk Glitter to give some sparkle. 

Once I am back home in 2 days time, I will be able to catch up with my reading blogs - once the washing and unpacking has been done. I did managed to hit the local craft stores yesterday!!!


Friday 6 June 2014

Birthday Wallet


I had seen this card in an edition of Making Cards Magazine and though that this would be ideal for my cousin's birthday as it was a great card for a male.
I did not have any of the stains or embossing folder that was used in the original but actually preferred what I used.
This card was made out of kraft card and I used the faux leather technique of Sheena Douglass for the strap part as that would get more use but not for the rest as I am not so keen on the feel on glycerine.
I used Darice Embossing Folder Crackle to create the leather effect and then used Scattered Straw, Vintage Photo and Rusty Hinge to create the colour.  I used a piercing tool and a brown alcohol pen to create the stitching effect around the edges and the birthday greeting.
I used a Phill Martin's Words of Inspiration stamp on the inside and then a variety of stamps by Bee Crafty to create small cards that I put into the wallet and it was nice that I could actually put some real money in it as well, to give the effect of a real wallet.
I also put his initials on the front using some dome letters that I had. I must admit to a quick phone call to his mother to check what his middle initial was.


Tuesday 27 May 2014

Back to Quilting

This is my first block completed for the quilt that I am making.  I am not sure what made me go rummaging through my cupboard to find the material that I had bought to start making this quilt.  I think it was just that I wanted something extra to throw on the bed for the winter that I decided that I needed to go back to quilting.
 
When I told my Mother that I had fished the material out and was quilting, she said that I had gone back to my real love and I suppose that it true.  It is just that it has been quicker to make cards than to make a quilt.
 
This was a pattern that was in Australian Patchwork and Quilting some years ago and I had bought the material at the time but it then just got left and I never actually did anything with it.  The original pattern was for a wall hanging but I just increase the amount of material required to make it a king size quilt.
 
I don't think that I have done any quilting for at least 12 years or more but there was no way that when I cleared out my craft room that any of my quilting stash was going to go and I was pleased that I hadn't.
 
This pattern is foundation pieced but I do not use paper, I use a light interfacing and trace the pattern on to it as it gives a little stability to the block.  Also, it does not blunt your needle as quick as paper does.
 
I was really pleased to get this first block done and now only have another 41 to go! I am hoping that I will be able to get all the blocks made within a year as I will still be making my cards and going to workshops for papercrafting.  I hope then it will be perhaps another two months for the quilting and binding before the quilt is complete.    It is certainly going to be a labour of love.

Sunday 18 May 2014

Out the kitchen Window

This is little smaller card than I usually make but I just loved the pattern.  This was from an old copy of a Parchment Craft Magazine.
 
I traced the pattern by using a stylus and then went over the border with Tinta Ink using green and yellow.
 
I inked around the edge of the card, teapot and cup with silver ink and then embossed the frame, curtains, teapot, card, mug, the petals of the border flowers and the border.
 
I painted the leaves of the border with Tinta Ink and the flowerpot and plant.  I also used ink for the decorations on the card, teapot and mug.
 
I then used a blue dorso crayon to colour the clouds and then mounted onto some blue card.  Using a two hole tool, I went around the edge of the card and then cut to finish.

Thursday 8 May 2014

Another Quick Card

Whilst going through my peel offs stack for the 2 quick cards I made the other week, I found that I had some medallion peel offs and thought that I would make another quick card from them.

I seem to have so many birthdays from April to June and need to end up making quick cards for some.  As I also have another rather large project on the go, I have needed to make some really quick cards.  This was not quite as quick as the other two as I had to cut out each layer by hand and was a little fiddly.

At first I was going to use glitter but then decided that I would pearlised card although that does not show up on the photo.

I stuck the peels offs on to alternating dark blue and white card and then cut each layer (of which there are five) and then mounted them with foam tape between layers.

I then mounted this onto some plain light blue card and put peel offs around the edge of the card and added peel off corners.

I then put a Dufex greeting on the finish the card.  I wanted the medallion to be the main focus and wanted the rest plain.

This card reminds me of the cards that I first starting making before I had the luxury of being able to die cut my shapes and sometimes it is nice to take that step back again.

Sunday 27 April 2014

Parchment in Blue

After making a few quick cards, it has been nice to have the time to spend on one card.  I find it a lot easier to do parchment craft in natural light so am loving the lighter evenings. 

I took the pattern for this from March Parchment craft and traced it and then worked it.  I much prefer just whitework for some reason on parchment.

Once I had completed working the pattern, I then cut it out using a two needle tool and mounted it onto some  periwinkle foundation card.  

As it is difficult to mount parchment without the glue showing through, I attached some blue gemstones to hide the glue.  I used a Martha Stewart punch in the corners of the periwinkle card and then mounted this onto some Core'dinations  Gemstones card.

This was then mounted onto some Blue Centura Pearl card and I then added a metal birthday greeting to finish. 

Monday 14 April 2014

A fine way to spend a Saturday

I spent a lovely day at Aexandra Palace on Saturday attending the British Stamp and Scrapbooking show. The building is really lovely with the murals on the walls to the entrance and the lovely organ and stained windows in the Great Halls.
This is not a really large show but there are demonstrations every half hour and plenty of places to sit, unlike other shows that I have been to and it doesn't feel as crowded - unless you happen to go near Barbara Gray's Clarity Stand or Sue Wilson's Rubbernecker stand.

There were a couple of stands that I had not visited before and I bought a couple of text stamps that I had not seen before but thought that they will fill a hole in my craft stash.

I managed to spend lots of money but also had time to watch some of the demonstrations.  I managed to see Julia Watts demonstrating Shimmer background techniques using the new Cosmic Shimmer Paints, Anna Marie showing us to make a rose and decorating a shape using her stamps, Kay from Indigoblu demonstrating using their alter ego products and quite a few demonstrations from Pam Smith using a variety of Cosmic Shimmer Ink Sprays, Texture Pastes, Silk Glitters and Gilding Flakes.

There was also demonstrations by Phill Martin and Sam Poole but I never made these.  There was meant to be more demonstrators but a couple were not able to make it due to illness.  I still managed to pick up tips from all though.

Although I bought some goods from Clarity Stamps, it was just too crowded to see Barbara demonstrating.  I did get to see Sue Wilson demonstrating but her stand was laid out a little better to see.

I also managed to get to speak to Sue for a while and it was nice to catch up with her and even got time for a quick photo with her.  

The best part about this is that it is only a 35 minute drive from my house (although getting back always takes a lot longer due to having to get back on the North Circular) and makes a great day out.